Great God

Hello everyone, I am Yunque丨I love Guo Fenghe. The standard ladder journey in February has begun again, and today I will bring you a deck that I will quickly legend on February 1st – Aggro Druid. Nowadays, the pace of the standard ladder is very fast, and almost all decks are aggro decks, such as aggro druid, technology knight, knife rogue, stealth rogue, etc. Fast break points are very fast, and fast break requires a certain amount of luck and operation. If you are lucky, you must also learn to make operational decisions and communicate with others. The set of aggro druid I recommend to you today has a very high upper limit. It can create many scenes with low cost and rely on spells, and even kill the opponent with 4-5 costs. This kind of deck that can end the game quickly is certainly a weapon for scoring points. The author myself spent just over 3 hours on the afternoon of the 1st to go from Bronze to Legend, with a total of 36 games and a winning rate of 72%. Next, I will explain in detail my understanding of this deck and how to play against various professions. I hope it will be helpful to you, and I wish you all a winning streak in the new season.

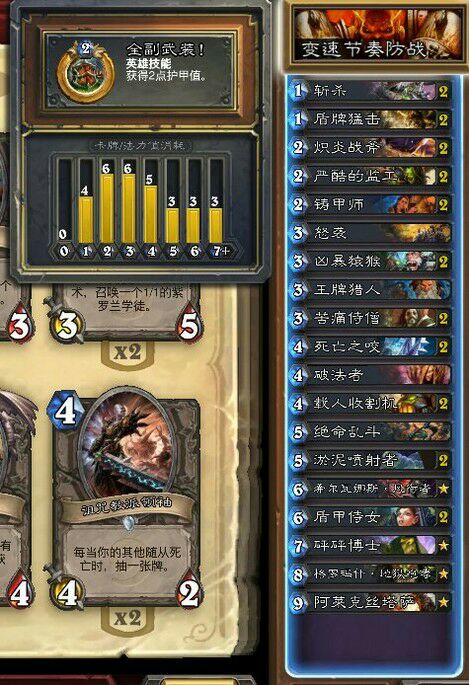
1. Deck analysis: The entire deck is mainly focused on spreading the field, and is combined with Savage Roar and other spell buff cards to kill. The rhythm of the early stage mainly revolves around the noise monsters, and in the mid-term, it relies on the swarms of fireflies and the growth of trees. The deck has no late stage to speak of, and the outcome is determined in the early and mid-term. It can be seen from the winning rate in the picture above that our second hand has a higher winning rate than the first hand because we have one more coin in the second hand. When there are coins, we spend 1-2 times, and the noise monster is easier to expand, and the frequency of expansion is also lower. The more, the buff income is also higher. In the early and mid-term, use small frequency to stand on the field, and in the mid-term, use Solar Eclipse and Savage Roar to kill quickly. Therefore, our core is to spread the field and maintain frequency. The more frequency, the greater our advantage, so we must have a clear mind when retaining cards in the starting hand and exchanging the field. The addition of Tree Growth has raised the entire deck to a new level, both in terms of standing and killing. It can be said that it is a very good buff card for fast attacks that spread the field. The entire deck construction is almost all spells, so Fungal Treasure can almost stabilize three cards. Although it has been weakened from 2 to 3, it is still a very good pass card. It is one of the must-have cards in the starting hand. The cards can be deployed in conjunction with the Noisy Monster, and a large number of spell resource cards can be used to allow the fireflies to stably spread 6-7 attack frequencies at 5 costs. The entire deck is relatively smooth to use, and there are often situations like Sky Hood, which everyone should have a deep understanding of when using it.

Code: /gH3A+/60D++OQDAA==

1. Core single card:

Noisy Monster is an important card that determines the upper limit of this deck in the early stage. As the only follower card in this deck, its main function is to cooperate with low-cost spells to quickly expand and fill the field. Regardless of whether you have a Noisy Monster in your hand first or later, you can keep it directly. If you have a Noisy Monster in your hand, you can choose to consider keeping Thunder Bloom, Activation, Tree Reinforcements, Cute Creature Attack, and Wild Power, etc. Of course, you need to make your own decisions about the specific game, because you want to quickly expand the field and at the same time, you must not cut off your cards. So whether you choose to switch to low-cost spells to find fungal treasures is also a decision point. Of course, there is no fixed saying which kind of starting hand is wrong to keep cards. This card is very flexible overall. I will tell you the cards that must be kept in your starting hand. There are also many cards that can be kept and exchanged, such as what I mentioned above. The cards I must keep in my current starting hand for actual combat are Noisy Monster, Spell Study and Fungal Treasure. The rest of the cards can be adjusted according to the order of hands and the opponent's profession or other cards. Everyone must have a certain amount of actual combat cards after more actual combat. With experience and understanding, you can selectively keep cards according to your own playing style.

No matter which version, Swarm of Fireflies is almost a full card in the Druid system where spells dominate the field. Because the frequency of 7 2-2s on a 5-cost shop is too strong and too supermodel. If the opponent is confused, there is a high probability that we can rely on Savage Roar to kill in the next round. No matter which profession you play, this kind of card that quickly opens up the field is very powerful. In most cases, the opponent has to passively clear the field. We can rely on the remaining frequency to return to the field and win. During the civil war, this card is the card that determines the outcome. The one who fills the field first has a huge advantage.

Currently, ladder thieves are mainly in aggro mode. Mainly knife thieves, stealth thieves and combo thieves, with more knife thieves. In the ladder, I mainly encounter knife thieves. In the match against thieves, the main thing is to pay attention to preserving blood, because thieves' burst damage is very high, so we have to let the followers resist part of the damage and stand on the field so that the thieves are forced to clear the field. The biggest weakness of thieves is that they don't have AOE cards. So when we have a lot of field frequency, the thief can hardly handle it. At this time, we can win through spell buffs and solar eclipse combined with savage roar. In terms of starting points, we mainly keep the Noisy Monster, Spell Study and Fungal Treasure. Other low-cost spell cards can be adjusted according to personal play style.

(Using fluorescent swarms to create a counter-killing scene for beheading)

The current ladder druids are mainly constructed as aggro druids and treant druids. Some of the cards in the deck may be adjusted, but they are basically based on these two frameworks. During the civil war, we mainly strive for control of the field. The one who fills the field first has the advantage. Because druids basically have no raid cards, it is difficult to return to the field on their own initiative. They can only wait for the next wave of relief, so the one who fills the field first Advantage. Because in the next round, you can use the spell buff card to gain access to the opponent's scene for free. Of course, if the opponent cannot solve a large number of frequencies, we can most likely use Solar Eclipse in combination with Savage Roar or other spell buff cards to kill them. In a civil war, whether you can quickly kill the Noisy Monster in the early stage is the key point that determines whether you can win the game, because before the 3 charges, you can basically declare victory by laying out more frequent scenes. Therefore, it is particularly critical to start the civil war with noise monsters and low-cost spells.

The current ladder is mainly duel method, followed by cosmic method. When we play the mage, we mainly speed up the tempo and try to put pressure on the opponent's screen as early as possible. We cannot let the opponent delay until the mid-to-late stage. We fill the screen to complete the kill before 5 charges. After the 6th fee, it is difficult for us to control the rhythm, so we can keep low-cost spell cards in our early hands to expand. We can also rely on Thunder Bloom to cooperate with Fireflies Group or Tree Man Growth to expand, which is also very powerful. Our winning point is to establish the field before 5 charges, because in most cases the mage cannot manage the early scene, and we have to complete the kill when the opponent is weak.

Currently, the ladder warriors mainly focus on anger battles and bomb battles. Today's match against warriors seems to be very easy. Because once a warrior cannot handle the scene in the early stage, it is very easy to die suddenly, and the card that threatens us when the warrior is removed from the field in the early stage is Blade Storm. Therefore, when we fight the warrior, we only need to properly control the health of the friendly followers to create a huge scene. Rely on the buff card's gain and the solar eclipse combined with the brutal roar to kill.

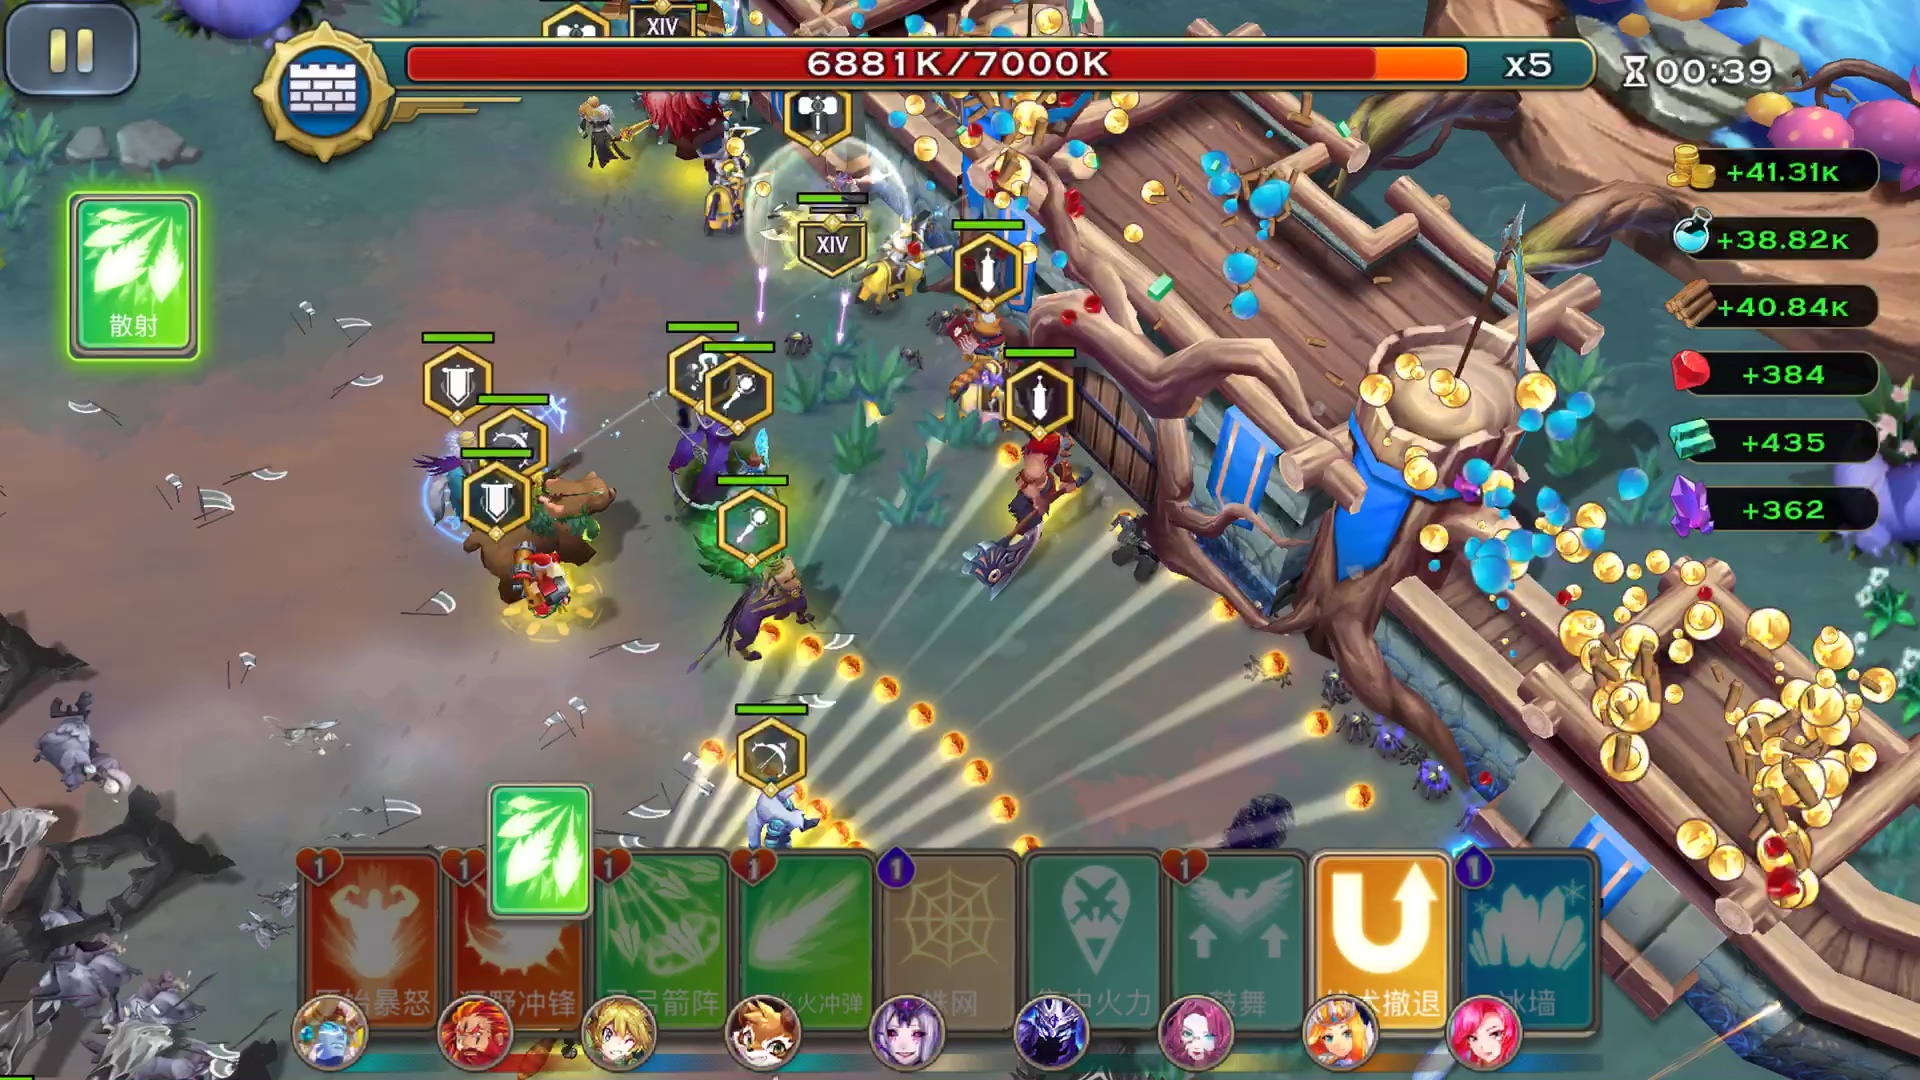
(Low-cost and fast expansion to scare away fighters)

Currently, almost all ladder knights are technology knights, and of course there are also a small number of holy knights. When we play against the Cavaliers, we only need to move faster than the opponent, and we will win. Tech Knight has almost zero combat power before the 4th fee. We can quickly win with the Noisy Monster before the 3rd fee. Of course, if the opponent does not play 4 plus 1 in the mid-term, we can also fill the field with fireflies in groups and rely on spell buffs and Kill with a savage roar.

Currently, ladder hunters are mainly T7 hunters. The main point we gain from hunting hunters is that when we have the advantage on the battlefield and the opponent has a secret hanging over their head, we can guess that the opponent's secret is an explosion trap. At this time, all our followers on the scene are lower than or equal to When we have two health points, we don't have to rush to hit the opponent's face. Instead, we can use spell buff cards to make the follower's health higher than 2 points by passing cards, and then hit the opponent's face. If we have no cost to use spell buff cards in the current round, we can endure it for one round and activate it in the next round. Don't rush to slap us in the face and lose your advantage.

The current ladder priests are mainly dragon priests and cosmic priests. Dragon Priests now almost all carry 3 or 4 fee AOE, so when we play priests, spell buff cards are very important. 3 blood and 2 blood are a qualitative change. We have a great advantage over Dragon Priest when playing Cosmic Priest, because in most cases Cosmic Priest is very passive in the early stage and basically hangs up. We can easily win by quickly setting up the field. When playing Dragon Priest, remember to diversify your resources and don't use all the resources on the scene at once, unless you can guarantee that the opponent will not be able to eliminate your wave of overthrow.

The current demon hunters on the ladder are mainly magic steel blinds and control otk blinds. When playing Magic Steel Blind, we mainly win through frequency. If we lay too much, it will be difficult for the opponent to clear the field in the early stage. We can continue to draw blood in the mid-term and then cooperate with the roar to kill. When facing otk blind, we must also remember that changing from 2 blood to 3 blood is a qualitative change. It is easy for otk blind to clear all the two blood minions on the field. Therefore, when we build the field in the early stage, we give priority to using the power of wild to increase the cost of the field. Follower health. In the mid-term, rely on the frequency of the scene and the roar or tree growth to kill.

The current ladder warlocks are mainly zoo and invocation. When we play warlocks, we also try to establish the field first, because we do not have the ability to return to the battlefield. If we establish the field first, we can use the spell buff to free the opponent's followers. When playing the Invocation spell, we need to defend against the opponent's 3-cost Dark Sky. We mainly increase the blood volume by applying buffs or diversify the investment in follower resources, and then expand the field to win in the mid-term.

This concludes this guide, thank you all for reading. After playing this deck for a few times, everyone will be able to master its strengths. After the actual battle, you will definitely have your own understanding of the deck and how to play it. I wish you all a winning streak all the way to legend. If you have any other ideas, you can share them in the comment area. Thank you for reading.

Hearthstone Tycoon Battle Deck With Orthodox Clan Battle

Hearthstone tycoon battle deck matching, but then again, there is no system in China that allows Hearthstone players to support themselves. Trump and these high-level players all make a living as game anchors, and the effort they put into this game cannot be matched by those who call themselves "professional players." It’s a given that they bear rich original fruit.

Let’s get down to the topic and talk about the deck! This set is the battle between the 22nd ranked tycoon in the US server S1 settlement.

Local tyrant spell deck_Local tyrant war card group_Trench warfare card deck

The original local tycoon battle has become increasingly difficult to win in the Chinese server. I still persisted in playing at the beginning of the S1 season, and the winning rate sometimes did not reach 50%. Apart from my personal strength, this set of warriors has a slow pace and cannot be played. The weakness against medium-sized creatures has also been mastered by most high-end players.

He is ranked 22nd on the ladder in the US server S1 at the time of settlement. His set of warriors has been widely used and can also be seen in the national server (such as the new battle developed by the national server's high-level player Abyss Demon). Due to personal preference, I replaced a Baron of Geddon with a Queen.

Local tyrant war card deck_Local tyrant spell card set_Trench warfare card group

Many people say that it is an advantageous game for local tyrants to defeat followers and thieves, but I really don’t agree with it. Servants, thieves, and a large number of 33 and 44 creatures are difficult to deal with in local battles. If you wait for a brawl or attack with weapons, the blood line will go down too fast, and you may be killed by Leeroy in cold blood; use shield to kill. If so, the cards in hand basically cannot keep up with the thieves, and the thieves' big screws and Northrend will become a nightmare for the warriors.

This new version of the Tuhao War mainly replaces the 24 Riot Berserker with the 43-Charging Kor'kron Elite Guard, and selects the high-cost big brother that is burdensome in the original Tuhao War, and fills the empty space with two small blue dragons. Go in.

Local tyrant spell deck_Local tyrant war card group

After the change, the warrior will no longer have the situation where Bloodhoof Queen's big screws are stuck in the hand in the middle game, and because the low-cost solution card is full (full of slams and a cleave), the warrior's health line It can be maintained relatively high, and in the later stages, it will be easier to use Blood Roar to kill creatures.

Battle ideas:

Trench warfare deck_Local tyrant spell card set_Local tyrant war card group

It’s not much different from the original version of the Nouveau riche battle. Don't think that with two 43 charges, you can race against the opponent. This deck ultimately focuses on controlling the scene. What we focus on is the opponent's hand, not the opponent's health. In terms of keeping cards in your starting hand, 2-cost creatures and axes are the best choices. Execution and Shield Might can be kept when playing against druids, but they can be replaced against warlock hunters. Cleave is easy to get stuck if you keep it, but if you don't keep it, you may not be able to catch it. It all depends on personal preference.

The winning mode of this deck is relatively simple, there are probably two types. The first is to rely on hand advantage to slowly wear down your opponent, which is also the idea of ​​​​most mid-to-slow decks. But this idea is a bit dangerous, because the warrior itself cannot cause damage. When playing against a profession with hard solution such as Mage and Shaman, it is very likely that the card library will be exhausted, threatening to be cleared by the opponent, and ultimately unable to win.

Trench warfare deck_Local tyrant spell card set_Local tyrant war card group

I personally prefer the second way to win, which is to spray the 9-cost Red Dragon to 15, and use the 10-cost Hell's Roar to take it away with weapons. This routine seems to be a trick, and it seems difficult to complete. In fact, it is normal for the blood roar on the 7th cost to still have 5 attacks at the 9th cost. When combined with the 10-cost Hellscream, it can hit 15, and the opponent will be helpless. If you don't have Gorehowl, you can consciously keep a 32 ax hanging on your body, or keep a harsh overseer to cooperate with Hellscream.

Deck compatibility:

I said that this deck is still being debugged. Compared with the original Trench Warfare, this deck has improved card-drawing efficiency and mid-game capabilities, but its late-game decisive battle capabilities have relatively declined. As far as I understand, this means that the operator should choose more combinations of red dragon slaps in the face, instead of carelessly fighting the opponent in the late stage.

Since it is called trench warfare, it is inevitable that it will be difficult to form. Although this set of 5 oranges and 4 purples already belongs to "civilians", it is a pity that if you don't recharge, you can only look at the oranges and sigh.

Kahn Deck Recommends New Version Of Tuhao Battle Deck Experience Sharing

The China-European Championships triggered a large-scale discussion in China about card copying tables. From my personal point of view, there is absolutely no problem in copying the card list. The key is to play after copying, fine-tune after playing twenty or thirty games, and sum up experience after fine-tuning several times. Some people say that those who copy homework without thinking will always get low scores, but Hearthstone is not a college entrance examination where you fight alone. The Hearthstone competition is open and information is king. Although you cannot cheat, at least it is an open-book test.

But then again, there is no system in the country that allows Hearthstone players to support themselves. Trump and these high-level players all make a living as game anchors, and the effort they put into this game cannot be matched by those who call themselves "professional players." It’s a given that they bear rich original fruit.

A new version of trench warfare

The original local tycoon battle has become increasingly difficult to win in the Chinese server. I still persisted in playing at the beginning of the S1 season, and the winning rate sometimes did not reach 50%. Apart from my personal strength, this set of warriors has a slow pace and cannot be played. The weakness against medium-sized creatures has also been mastered by most high-end players. He is ranked 22nd on the ladder in the US server S1 settlement. His set of warriors has been widely used and can also be seen in the national server. Due to personal preference, I replaced a Baron of Geddon with a Queen.

Many people say that it is an advantageous game for local tyrants to defeat followers and thieves, but I really don’t agree with it. Servants, thieves, and a large number of 33 and 44 creatures are difficult to deal with in local battles. If you wait for a brawl or attack with weapons, the blood line will drop too fast, and you will probably be killed by Leeroy in cold blood; use shield to kill. If so, the cards in hand basically cannot keep up with the thieves, and the thieves' big screws and Northrend will become a nightmare for the warriors.

This new version of the Tuhao War mainly replaces the 24 Riot Berserker with the 43-Charging Kor'kron Elite Guard, and selects the high-cost big brother that is burdensome in the original Tuhao War, and fills the empty space with two small blue dragons. Go in. After the change, the warrior will no longer have the situation where Bloodhoof Queen's big screws are stuck in the hand in the middle game, and because the low-cost solution cards are full (full of slams and a cleave), the warrior's health line It can be maintained relatively high, and in the later stages, it will be easier to use Blood Roar to kill creatures.

Battle ideas:

It’s not much different from the original version of the Nouveau riche battle. Don't think that with two 43 charges, you can race against the opponent. This deck ultimately focuses on controlling the scene. What we focus on is the opponent's hand, not the opponent's health. In terms of keeping cards in your starting hand, 2-cost creatures and axes are the best choices. Execution and Shield Might can be kept when playing against druids, but they can be replaced against warlock hunters. Cleave is easy to get stuck if you keep it, but if you don't keep it, you may not be able to catch it. It all depends on personal preference.

The winning mode of this deck is relatively simple, there are probably two types. The first is to rely on hand advantage to slowly wear down your opponent, which is also the idea of ​​​​most mid-to-slow decks. But this idea is a bit dangerous, because the warrior itself cannot cause damage. When playing against a profession with hard solution such as Mage and Shaman, it is very likely that the card library will be exhausted, threatening to be cleared by the opponent, and ultimately unable to win.

I personally prefer the second way to win, which is to spray the 9-cost Red Dragon to 15, and use the 10-cost Hell's Roar to take it away with weapons. This routine seems to be a trick, and it seems difficult to complete. In fact, it is normal for the blood roar on the 7th cost to still have 5 attacks at the 9th cost. When combined with the 10-cost Hellscream, it can hit 15, and the opponent will be helpless. If you don't have Gorehowl, you can consciously keep a 32 ax hanging on your body, or keep a harsh overseer to cooperate with Hellscream.

Deck compatibility:

I said that this deck is still being debugged. Compared with the original Trench Warfare, this deck has improved card-drawing efficiency and mid-game capabilities, but its late-game decisive battle capabilities have relatively declined. As far as I understand, this means that the operator should choose more combinations of red dragon slaps in the face, instead of carelessly fighting the opponent in the late stage.

No Damage To The Jungle And Move Smoothly A. Master The Eight Major Points To Defeat The Wild Rats.

Today, I hope that from different angles, more players who really like Twitch can learn something suitable for themselves. If they want to fully understand this hero and gameplay, they need to do everything.

Tucci's official positioning is as a shooter, and the mainstream position is AD position. Since it is non-mainstream, something must be changed.

Chapter 1: Hero Analysis

Point ①:

It’s everyone’s understanding of the basic skills: jungle without damage, smooth A understanding, whether they are thorough and proficient enough, mouse jungle can be regarded as the standard.

Everyone here has a different approach to leveling A:

The first type: right-click the mouse and point A (directly place the mouse pointer on the enemy unit and press the right-click mouse to trigger the draw A)

The second type: Keyboard A (intelligent casting of flat A, press the A key on the keyboard, the hero will immediately attack at the position pointed by the mouse pointer)

The third method: Keyboard A and the left mouse button point to level A (press the A key on the keyboard, a small circle will appear at the position pointed by the mouse pointer, which can be controlled with the mouse, then left-click to select the target, and the hero will perform a level A )

Everyone has different habits, so there will be some differences in the practice and mastery of walking A. Here I recommend you the third method of flat A, followed by the first method. If you are still using the second method, do your best. You can change it if you change it, and you can still play it if you can't change it. After all, playing games is for fun.

Point ②:

What talents does the jungle rat bring_The order in which the rat jungler adds points_The rat jungler adds points to his jungle equipment

That is, the equipment formation speed is not as fast as that of the AD position. The mouse has multiple strong periods, which means that the strong period of the AD mouse will come faster. The mouse jungler must first ensure that the summoner is a jungler, not an AD position. That is to say, if you play AD, even if you play A picturesquely, it will not help the lane to establish an advantage, and it will be in vain. In addition, the AD position equipment is formed faster than the jungle position. If you play the mouse jungle position, you will find that your damage is not the same. When AD is not at the same level, there will be wrong damage judgments, resulting in team battles being lost, and thus doubts about the rat jungler. Then I want to say that you must understand the priorities of this guide. The jungler is the main player, and who does it? The jungle is the first time, so only the summoner in the jungle position knows what to do at a certain time and place. Because the jungle is the soul of this game.

Point ③:

Regarding Tuki's Venom, some people think that this passive is useless. In fact, this is not the case. Although the damage is not comparable to Teemo's Poison, the damage is still considerable when the passive is fully stacked and combined with the E skill.

If you want to stack more passives, the requirements for moving A when catching people will be stricter. If the basic skills of moving A are not in place, it will happen. A to the minion, less A, flash A tower, these mistakes will lead to missed attacks. A good opportunity to kill, the high damage of the rat comes from the flat A one after another, so you need to practice the basic skills well.

Point ④:

When the rat jungler fails to gain an advantage in the jungle in the early stage, it is urgent to try to avoid direct conflicts with the opposite jungler, have a good vision, prevent invasion, and help the line establish an advantage.

Part Two: Skills, Talents

In terms of skills: main E and deputy Q, at level 3, a little W, a little bigger.

Rune recommendations:

What talents does the jungle rat bring_The rat jungler adds points to his jungle equipment_The order in which the rat jungler adds points

This is basically the case in terms of skills and talents, so I won’t elaborate too much.

Part 3: Hero selection and lineup matching

Let’s talk about fighting first. When fighting people, you need to combine your rank. What are you most afraid of when playing mice?

One is afraid of dying in the light, the other is afraid of not being able to produce output.

Platinum 2 or more removes the card, Widow

Platinum 2 or below can pull the stone, Yasuo, Murloc, Sword Master, Mantis, Lion, etc.

What are the situations when output cannot be printed:

One is Yasuo. Regardless of whether he plays well or not, a wind wall can perfectly restrain the mouse.

The second is Braum. A shield ultimate move has no penetration effect.

To add equipment points_What talents should a rat in the jungle bring?

Why take down Yasuo when the card is taken down? Why take down the card first instead of taking out Yasuo first? Because survival is more important than anything else. That is to say, death in the face of light: when the card is big, everyone will pounce on it and immediately lie down. Sometimes when the card is too fat, a person will fly over and take you away directly. Next, the player will choose lion or mantis. This kind of wild area is too strong. hero. The pull here does not take into account the opponent's proficiency with the hero, it is just a simple hero restraint. If the opponent is very proficient, it is basically GG.

Hero selection for teammates: Be sure to have a hero who is the first to start a team, and at least one hero. Rats do not have such big requirements for the lineup. If you are the first to start a team, the other party's attention will not be focused on Rat. There is a hero who can carry the hero until Rat finds the perfect one. output location. Communication is very important. When selecting people, choose the hero you want to play as early as possible. Tell the top laner, support, and choose the control and team-starting hero. The top laner is better, Stone, Ornn. The better assistants are Japanese girl and Braum, both of whom are strong, control and proactive. Relatively speaking, it's much easier to pick one.

Chapter 4: Going out to the jungle, catching people, and basic routines

How to catch it in the early stage:

The blue side opens red, those with platinum and below go directly into the grass in the middle, and then open Q and cooperate with the mid laner to go A, A, and AE to basically get first blood. Some of those with platinum and above will insert wards in the grass in advance, so they need to be in advance at this time. Q, the position of Q is the position circled in red in the picture below. Wait until you are invisible before going down, then go A, go A, go AE

High-level players usually flash directly when they see you appear. You only A once or twice. At this time, you go to the blue route, making the opponent think you are going to blue. As shown below, the red route is your capture. The route after one failed wave, and another wave. At this time, the opposite jungler's position is probably in the black circle. When he sees that his mid laner has flashed and is not dead, he will not come again and will fight him. Red, then you come out and fight him again in the middle, and he will basically die. In fact, if our mid laner has control, the card Fire Girl will almost die in the first wave.Then whether to help the upper one or the lower one depends on whether the opponent is pressing the line or not.

The purple side opens red. If you are below platinum level, just go directly to the river grass opposite the triangle grass and squat down to open the Q. If you are above platinum level and have prevention and experience, top laners have already set their eyes, so you need to follow the route in the picture below. Make trouble.

Then grab the middle lane, and you can mess with him regardless of whether you press the line or not, consuming his blood volume, his patience and mentality. The mid laner is also a squishy guy. If we are more aggressive here, you will be able to see it in less than a minute. When it comes to solo killing, remember to put a ward on the opposite blue before coming to the middle to cause trouble. If you are lucky, you can punish and grab a blue, or you can call the middle to help him. Because you helped Shangzhong once, you have the advantage in blood volume and supplies. No matter how three against three, we are the stronger.

How to catch it in the mid-term:

To add points to a rat's jungle equipment_In the order of adding points to a rat in the jungle_What talents should a rat have in the jungle

The three lines are very straightforward. You don’t need to go to the jungle, just follow the lines, as shown below.

Article 5: Late team battle positions, team battle ideas and timing of Q skill casting

The positions for team battles should be simple, as shown in the picture, our red and enemy black are the opposing sides, and our own position is green. Different greens are several different positions, all of which are acceptable. Remember to scan when hiding and don't let the other side know where you are. You also need to move around at any time to find a position where you can go around and cut into the back row during the fight:

The release of the Q skill is very important. It takes just a few seconds to find the perfect output position. No matter which side it is, as long as you see someone taking the lead, activate Q immediately and enter the battlefield.

Remember one detail, if the two sides do not really start fighting, because there are still a few seconds of invisibility, and the Q cooling time starts to be calculated after the invisibility ends, so when there is no real fight, press B quickly to break. The stealth state allows Q to enter the cooldown earlier so that it can deal with everything that may happen next, because the Q cooldown time is still a bit long.

Chapter Six: Endgame Harvest, Key Skills, Key Control, Positioning

The team battle is about to break out. If you fail to arrive on the battlefield in time, or if the Q mentioned in the previous article is still cooling down, be sure to be steady and don't panic. Wait for the Q to cool down and quickly enter the invisible state. At this time, the opponent will probably have residual health. Look for it. A suitable position, open the big A.

Before the invisibility ends, you must carefully observe the release of the opponent's key skills. For example, the size of the stone, the size of the robbery, hard control or explosion damage can make your screen black.

If there is something tough coming up, such as Glory, Sun Girl, various controls, and AOE coming at you, your position is particularly important at this time. You should stand at about 600 yards. The distance of the mouse level A is about 550. When you open it up, the distance will increase. 300, 600 yards can be pursued and defended.

When you go solo against others, you should look at other people's equipment and make comparisons. You should also pay attention to whether there is only one person on the opposite side. When you want to steal AD, the support may teach you how to behave if you are weak.

Chapter Seven: Equipment Selection

Platinum 2 and below:

Platinum 2 and above:

The Ranger's saber is upgraded after the attack speed boots are released.

Chapter 8: Headwind situation

Not every time you go to catch, you can successfully capture the head. You may encounter counter-crouching or encounter problems on your side. When things don't go your way, just accept your fate and stop causing trouble. Just do the vision brushing honestly. For wild development, counter-crouch appropriately. Rats are very hungry for equipment. Don’t give up the head you can grab. So when the wind is against you, correct your mentality, believe in yourself, and be decisive when betraying your teammates. Give up when the dragon should. If you keep your head down, you'll have a chance.

Conclusion:

1. If a worker wants to do his job well, he must first sharpen his tools. Without solid basic skills, everything is in vain!

2. Games are just an adjustment to life, and you must not engage in verbal quarrels with your teammates in the game. Even if it’s all the teammates’ fault!

3. If you can’t get points, 99% of the reason is that you are not strong enough!

Introduction To Pokemon Remastered Shenlong Rayquaza

In the game, Rayquaza is a Pokémon that many players love very much. Below, the editor will explain to you the combination of Rayquaza's skills and moves and how to deal with it. Players who like it can't miss it.

Rayquaza – the ultimate speed pusher

Pet Analysis: Cheerful Belt Pink Seat has become the fastest-replicating mainstream pet. After Sword Dance, it is easy to push the team with 2 attacks. It is very intimidating to civilians, and it is also the most decisive pet in the battle between local tyrants. No matter how good you are at the front, if you don't handle it well with the pink-orange sky-splitting, it will be easy to be reversed and pushed into the team. It is worthy of being the second strongest in the current version.

Personality: cheerful, naive, impatient.

Items: Sky-Splitting Powder

Matching moves:

Matching moves 1: Sword Dance, Stand, Wrath of Dragon Scale, Power of the Earth

Matching moves 2: Sword Dance, Dragon Scale Wrath, Crush, Earthquake

Matching moves 3: Sword Dance, Dragon Dance, Stand, Dragon Scale Wrath (used for Rift without powder)

Advantages: Extreme speed after becoming a fan, top double attack, and excellent characteristics make him a true god in the version.

Disadvantages: Just because he became the version of the true god, he was targeted by everyone. It requires certain counter-attack capabilities and coordination.

Play style:

Coping method 1: Get on the praying mantis. The iron wall rested until he struggled.

Response method 2: Bang Jila, false accusations and hang him.

Countermeasure 3: Focus Lugia's air blast and take him away.

Countermeasure 4: Make false accusations against Avalanche Red Dragon and violently abuse him.

Countermeasure 5: Hai Huangya's backhand comes out and breaks the weather to kill him instantly.

Countermeasure 6: Use the same method to break through the Graton Dragon Claw or attack with sharp stones to kill.

Summary: Rayquaza is still very strong. Therefore, if there is a team on the opposite side that has Rikuong, you must first have a secret weapon. If you accuse Banjila falsely, you accuse Avalanche Gyarados, and Mantis rests on the iron wall. You must hide your secret weapon against Riekong. No matter what happens ahead, don't take out your secret weapon. Only when the opposite side is free can your own secret weapon appear. It is still very cost-effective to hide a blue pet for yourself and completely seal the orange pet on the other side.

The above is the content of the introduction article about the Pokemon remake of Rayquaza. Regarding the content related to Pokemon Duel, I hope it will be helpful to you in the game. Download and learn more about the game.

How To Build The Roar Druid Deck In Hearthstone. How To Build The Roar Druid Deck In Hearthstone. The Best Deck Recommendation For Un'Goro Roar Druid In Hearthstone

How to form the Roar Druid deck in Hearthstone is believed to be a headache for many players after the start of the new version. The editor has sorted it out for you here and brings you the best deck recommendations for Un'Goro Roar Druid in Hearthstone.

The best deck recommendation for Un'Goro Roar Druid in Hearthstone

How to form a Deck deck for Un'Goro's Roar in Hearthstone

However, due to an accidental inspiration today, I built this set of Roaring Druid and adjusted it for several hours while playing. In the end, I figured out the matchups of each profession and easily reached level 5. This set of cards is a combination of Super Life, Beast, Roar and Un'Goro's practical new cards. It takes 4 fees to take away the opponent. It can slow down the fight and prevent a stalemate. It is also cheap (the two ultraviolet are all blue and white). It can be said that they are integrated into one. Make no loss.

The playing style of this set of cards is similar to that of Super Druid, except for the cool ending of occupying the field and taking it away with a wave of roar or spores.

Along the way, we played against the mainstream decks: Quest Rogue (big advantage), various virtues (big advantage), Quest Mage (basically not seen, big advantage)/Priest (small advantage), Pirate War (small advantage), defense War (Xiaoyou), Elemental Shaman (Xiaoyou)

/Mid-range Hunter (Balance), Discard Magic (Balance), Paladin (Balance)/Murloc Shaman (Small Disadvantage), Non-Quest Rogue (Small Disadvantage)/Basically there is no big disadvantage game where you will lose badly.

The basic gameplay is as follows:

1. Keep cards in your starting hand:

On the premise of ensuring that you have something to play for 1.2 fees, look for powerful cards such as match-targeting cards or Jade Lotus Mark. The 1-cost Little Fire Crow is basically a must. Jade Lotus Mark, you can usually keep one after activation.

Engineer's Apprentice, Hoarder and Wild Force can be kept depending on your mood. For slower professions, you can keep the teacher, and for the first move, you can keep the despicable egg stealer. Other cards are generally not retained. For thieves and warriors, please remember to keep crabs.

2. After the start:

Except for special circumstances when you need to change your face to solve the opponent's key cards, try to use up every cost to get monsters on the field. This set of cards has no shortage of cards. There are many blessing cards for monsters. Basically, you only need one or two monsters to stand on the field. Shoot one or two more in one round, and with one blessing, you win.

At 5 or 6 charges, if you have thrown all the monsters in your hand and are still not standing, then it is basically a one-handed spell. You can decisively use the living mana to return to the field. Don't worry about where your crystals have gone. The living mana is very powerful. Whoever uses it knows.

3. Common winning strategies for decks:

1. Start with a small fire and a crow in your hand, and then a jade lotus and wild power. The 2-fee jump coin makes 3 233, and the 3-fee adds 3 334.

2. Little Fire + Evolution of Ravosaurus Cub, get a big advantage with 2 fees, and then fight casually.

3, 1, and 2 charges are a stable way to play monsters. At 3 charges, the Egg Stealer comes out. After death, there are two 11 dinosaurs left on the opposite side that cannot be removed. It is our turn to cast a Mark of Y'Shaarj, or just add another 11 to any monster. Advantages are established.

4. The balance of power situation reached 4 charges, we played the teacher, but the opponent failed to solve it, and the opponent exploded.

5. Activate the teacher for 2 fees, but the opponent failed to solve it, and the opponent exploded.

6. Crow or Crab spends 1 fee to get the Mark of Y'Shaarj, and the advantage is established.

7. There are two monsters with deathrattle moves of 11 on the field (Egg Stealing, Raid Evolution). The opponent happily clears us, leaving us with more than 4 monsters with 11 moves. They will roar in the next round, or +11. Or spore evolution, the scene is beautiful.

8. After hitting 5 or 6, we still can't stand the field. The opponent thinks they have an advantage and throws out the living mana. The opponent is dumbfounded. We regain the advantage and use various cards to start the cycle of building the field again.

9. The last highest level is also the best to use. After reaching 5 charges, you will usually have roar and living mana in your hand. At this time, you should calculate the remaining crystals after using the living body (including buying monsters that are not mana trees in advance. Pre-emption) The opponent will be able to kill a few mana trees). In the first round, the field is full of mana trees, and in the second round, the opponent will be roared away. It’s great!!!

Those of you who have never used Living Mana (and I know none of you have) need to try it twice to understand the mechanics. By the way, 4 tree roars will kill 18 health points per kill, and 5 trees will have 22 health points. If there are more than 5 trees, they will basically kill, and if there are less than 3 trees, just use the roar to clear the opponent's field. . It should be impossible to kill, 3 of them have 14 HP.

4. Analysis of the functions of special cards:

1. For general card usage, see the common routines above. You can basically try it.

2. For Ravadrasaurus, don’t wait for it to evolve. If it can’t evolve and there are no other monsters, go for it without hesitation. For evolution, give priority to 3+ attributes and death-recruiting plants. Divine shield and taunt can be used according to the situation, but others are generally left alone.

3. Mark of Y'Shaarj. It is not recommended to keep it in the starting hand, and it is not recommended to get the crow. This deck does not rely on one monster to win. Basically, it relies on many monsters to add bonuses together or a wave of roars/spores to win. The same Don't be obsessed with drawing cards. Decisively add +22 when it's time.

4. Crab, not only can you eat pirates, but it is also a beast card with a very good figure. In many cases, you can consider playing Crab first. In many games (such as hunters, warlocks, and shamans), you can jump to buy it as soon as you get it.

5. When weighing growth spores/roar, growth is generally used to remove the field, and roar is used to kill. If the roar cannot be killed, the chance of killing it by counting on growth + 3 attack is extremely low.

6. The power of wildness can not only +1+1, but also recruit 32 beasts. The use of the two options is basically half.

7. Nourishment is brought by the Loot Hoarder in exchange for one. The three Nourishing cards are crucial to the continuous cycle. Sometimes even if it costs 5 to pass the card naked, 6 costs can turn the situation around with just one hand of cards.

(Let’s briefly talk about Violet Teacher. There are two ways to use it. The first is to go naked for 4 costs. If you can survive, it costs 5 to start using various spells. The second is to wait for more spells that can be used in your hand, and use the teacher together. That’s it, the classic routine of transcendent virtue.)

5. Professional game ideas (according to the situation on April 9):

When encountering priests, druids, mages, and paladins, it is recommended to keep cards in the way that develops the fastest. There is no need to deliberately consider the target. Taking away the opponent as soon as possible is the target.

For the thief, you can keep one Crab card, and keep the other cards according to your own development. Also try to take him away before he completes the task.

Warrior, default to the opponent's pirate battle, try your best to find crabs, leave 1 fee, leave Yulian mark, leave activation, you need to play a great situation in the early stage to win steadily, plan every step to kill, and kill immediately if you can kill. Defensive battles are generally advantageous, unless the opponent is lucky enough to be particularly stable in defense.

Shaman, also looking for crabs, 1 fee, mark, activate, but this time let them use their body to prevent the murlocs from standing still.

Hunter, Warlock: Try to ensure that there are monsters at every cost. It is best not to leave any spells except Jade Lotus Mark. When fighting a hunter and warlock, whoever has monsters on the field wins.

The Strongest Deck Of Yu-Gi-Oh!

Floor 0 Guangdong Zhuhai Unicom netizen guest published on: 2013/1/1 19:19:38

Send a powerful deck of 40 cards that you think will kill the opponent's Shinroku Wushu in one turn. There are no trap cards in this deck. The purpose is to use magic cards to kill the opponent's monsters in one turn. Card Shinroku Wushu Bamboo Sword*3==== ==True Six Samurai Warriors Mizuho*3 (the two brothers do not explain) True Six Samurai Warriors Yingui*3 True Six Samurai Samurai Jizan*3 Six Samurai Samurai Shihan*2 Six Samurai Samurai Kagemusha*3 General Ziyan* 1 Messenger of Hades*1 (This card in hand can prevent you from being killed when you have no cards,) Magic Card Tornado*2 Reinforcement*1 (Forbidden cards can only be added to one card, there is no other way, there is no better card than Wolf Smoke) Purple Flame's Wolf Smoke*3 (the useful card is equal to three monster cards) The Power of Unity*3 (a special card for the Shinryu Martial Arts and Seconds. The Shinryu Martial Arts can usually produce a full number of people in one round. It is a unity plus 800*5=4000 attack. Three cards of force is 12,000, you know) Six Martial Arts Three-stage Rush*3 (clear all obstacles on the opposite side and attack the player directly) Unity of Six Martial Arts*3 (You must be able to draw 3–6 cards if you want to draw cards, you know ) Gate of the Six Martial Arts*2 (Actually, if you can draw one, it will be enough for you to summon all the Six Martial Arts. It is best to have 2 or 3, which will cause too many hands) Resurrection of the Dead*1 (required) Hurricane*1 (clear magic) Necessary for traps) Black Hole*1 (Clear all the monsters on the opposite side and then summon all the Shinryoku Samurai to the scene) Sword of Light*1 (Essential for defense and you can also see the monster cards ambushing on the opposite side) Extra deck of Shinryoku Samurai Purple Flame*3 (required) Ice Barrier Dragon Divine Spear Dragon*1 That’s it

What Are The Runes Of The Barbarian King In League Of Legends?

What are the runes of the Barbarian King in League of Legends?

Many people like to use Barbarian King very much. The single-band ability of Barbarian King in the later stage makes opponents very troubled. Many novice players want to know the runes of Barbarian King in League of Legends. Below is the relevant content about the Barbarian King's runes in League of Legends compiled for you by the editor of Study La. I hope it will be useful to you!

45 Barbarian King Rune_Barbarian King's Rune_Mobile Game Barbarian King Rune

League of Legends Barbarian King's Runes

45 Barbarian King Rune_Barbarian King's Rune_Mobile Game Barbarian King Rune

Attack speed is very important to the Barbarian, and wearing it is necessary and necessary.

Many players may be surprised that there is no critical strike rune. Mo Chen has already mentioned it above. If a hero wants to increase his points, it does not mean to go up to fight directly, but to grasp some detailed factors. The barbarian is weak online in the early stage, so we must Use the ability of Q recovery and E consumption to complete the laning.

45 Barbarian King Rune_Barbarian King's Rune_Mobile Game Barbarian King Rune

Talents of the Barbarian King in League of Legends

45 Barbarian King Runes_Mobile Game Barbarian King Runes_Barbarian King’s Runes

Many players are accustomed to using the bloodthirsty talent and using the barbarian's critical hits to restore a certain amount of blood. But the mainstream of Manzi is enthusiasm. Why is this? Let’s analyze from Manzi’s positioning. Manzi is a level A-type top lane hero. The main damage comes from non-stop A, and the effect of enthusiasm is the superposition of level A.

Secondly, Manzi's Q has a very high recovery rate when angry. We can achieve high recovery without bloodthirsty recovery.

Mobile game Barbarian King Runes_45 Barbarian King Runes_Barbarian King’s Runes

The team fighting style of the Barbarian King in League of Legends

The Barbarian King's team battle has very high requirements for the timing of entering the battlefield. Because it is a very important carry point, it cannot be opened or taken first. If you are forced to use the ultimate move, then this group is basically out of business. Make sure you have R before going to the group, otherwise go to lead the lane without R. Make sure to kill the opponent's back row in the group. Finally, have R and sprint in hand at the same time. When playing Barbarian, you mainly play four and one point push. You need to have a server in the team. A mage with excellent troop clearing ability, such as a barrage or a bomber, can guard the tower. He can easily drag the opponent to death with a blind line. The timing of entering a team battle is actually based on experience. The barbarian must enter as a back-up player and let the jungler or support in the team carry out the first wave of attacks. At this time, the opponent's skills are almost the same before attacking, and the second wave will be used. Time to enter the battlefield, cooperate with teammates or one person to kill AP and ADC, and then the team battle will basically be won.

My disadvantage is usually that I lead the wing without thinking, communicate with my teammates, and would rather drop the outer tower than defend the high ground. Basically, if I do this twice, the opponent will be unable to survive. This is what elementary school students often call "stealing towers."If the opponent comes back with a high output, you can tell your teammates to try to fight. If the opponent comes back to guard the tower with other average output, then we go back to the city to buy equipment, and then look at the situation. If we are throwing a highland tower, the opponent Come back with a meat, ignore him, throw a W, and continue to demolish the highland tower until their people come back.

In the lane, please calculate the opponent's damage accurately and activate your ultimate move in advance, especially if you have the giant Garen in your hand. If we go against the wind and the Barbarian King enters the field in a team fight, the ultimate move can be activated at half or even 2/3 of the health, in case the enemy's damage is too high and cannot be activated. If there are high-explosive heroes on the opposite side, during the fight, the ultimate move can be activated Open it when you have more HP. As long as you open it, you will basically win. No matter how bad it is, you will only make no profit or lose.

League Of Legends: A Strategy Guide For Mid Laner Silas

Said it in front

The author is currently in the Platinum Ranking. The purpose of writing this guide is to share some of my thoughts and experiences on using Sylas, and also to help some players who don’t like Sylas understand Sylas as a hero and learn to avoid Sylas’s attacks. Strengths and exploit this hero's weaknesses to counterattack. Due to the author's game level, there may be some understanding problems in this article, and I hope you can give me some advice.

I think Sylas is a relatively simple hero who also has a short CD and a high amount of recovery skills, a flexible R skill, and a high upper limit. Using Silas does not require complicated operations and combos. If you properly grasp the timing of using the four skills, you can have good strength. Therefore, it is also suitable for players who are not good at operations.

Introduction to hero skills:

Breaking the Enemy Forbidden Method (P):

Silas is an important source of damage and wave clearing skills in the early and mid-term. The large attack speed attached to this skill allows Silas to quickly hit multiple A-levels in the early game. At the same time, the 0.3 AD bonus and 0.25 AP bonus attached to this skill also provide Sylas with a lot of power in the early stage. Supplementary damage is the support for Silas’ hero strength.

Chain Whip (Q):

Skills used to replenish dangerous knives, clear lines, and consume remotely (mana flow ties), and also provide short-term low acceleration (15%). Q1 has an AP bonus of 0.4, and Q2 has an AP bonus of 0.8, so if they all hit, the damage of this skill cannot be underestimated.

The Q skill has a more obvious hand raise, and the blue bar of Sylas in the early stage is also relatively short. Therefore, when consuming it online, you need to ensure the hit rate of the Q skill as much as possible, because Sylas without blue is like an empty gift box. No one likes it.

Regicide Thrust (W):

An important skill when fighting, it has short-distance dash, 0.9 AP bonus and provides high blood recovery. At the same time, it can cancel the flat A back swing, so when fighting, you can use AWA combo to hit all your own moves more quickly. break out.

This skill can be used to penetrate walls. At the same time, the blood return mechanism is triggered when the enemy is contacted at the end of the dash. If you are interrupted or killed during the movement, the blood will not be returned. Therefore, try to avoid it when the blood volume is extremely low. Bet that the opponent can't react and can't kill you in the air, or use the flash W combo to steal a bite while the opponent isn't paying attention.

How do melee heroes line up with Lu Bu_lol melee ap hero_melee heroes in English

Stealth/Capture (E):

Silas's core skills include displacement, 1.0AP bonus, and short-term control + dash. The use of this skill is the key to determining Sylas' upper and lower limits. In the early stage, the hit of E2 basically determines whether you can complete a single kill online. In the middle and late stages, Silas's E skill determines whether you can smoothly approach the back row, and it is still an important source of damage.

It should be noted that if Silas's E2 is not intended to be used in a sudden attack, try to place it in a place where it is impossible to draw people. A poorly timed E2 may ruin your high bounty, a key group or even the entire good team. bureau.

His way of doing things (R):

The R skill is one of the skills that determines Sylas's upper limit. During team battles, Sylas basically relies on the stolen R skills to determine the style of team battles. He is the first to start the team (stone man, bull head, centaur, nagas). (Er) or back-hand harvesting (Juggernaut, Kayn), etc. Of course, the opponent's ultimate move must be made good use of according to the specific situation.

At the same time, when using the R skill to steal the opponent's ultimate move, a passive layer will be given.

Hero skill points:

Mainly W, I don’t really recommend the main Q style of play. The main Q gameplay will be more comfortable during the laning period, but when duels and small-scale team battles break out in the jungle, the strength of Silas without the advanced short CD W will drop a lot, which is to say that he is giving up the basics to compete with the last.

At the same time, I think that the strength benefit brought by Silas's high recovery gradually decreases as he progresses to the later stage. Therefore, I personally recommend the main W play method, usually the deputy E, which can be adjusted according to the appropriateness of the opponent's situation 2- At level 3, press Q and then E. (Of course, you can also use the secondary Q. In this case, the error tolerance rate will be lower, but the line clearing is quite comfortable)

Hero talents:

The main series is generally yellow.

conqueror:

lol melee ap heroes_how do melee heroes line up with Lu Bu_melee heroes in English

To fight against the God of War talent, Sylas's extremely fast burst can quickly add layers of Conqueror, and can already provide dozens of points of magic power during the laning phase. At the same time, Sylas's magic power attribute has a very high rate of return, which can Said to be the most suitable talent for Silas.

Calm and relaxed:

Calm and calm, Silas's good helper. It is a very useful talent whether it is to get through the embarrassing situation of no mana in the early stage or to help you harvest in team battles.

Legend: Resilience:

There is nothing else good about this level. If you choose the yellow type, you will basically have to choose this talent.

Perseverance:

It can be said that it is a talent that is more suitable for Silas's characteristics. The damage bonus provided when the blood volume is low is more suitable for Silas than other talents in this layer.

Players who are not confident in laning can consider Quick Step, which improves endurance but the corresponding damage will be reduced.

There are two point methods for the secondary system, the blue system and the enlightenment system.

The blue series is mainly based on mana flow ties and transcendence. There’s not much to say about this part, mana and CD are both attributes that Sylas needs very much.

The enlightenment system is mainly biscuits + astral insight/time warp tonic. The main thing is battery life. This talent can be used by heroes/mages who are difficult to fight in the lane. At the same time, astral insight can also reduce the CD of the golden body.

Small fragments are always two magic power fragments + one corresponding resistance fragment. The reason why I don’t choose 8 skill speed is because I personally feel that when Sylas is at a low level, 8 skill speed does not allow you to hit an extra W. However, at a high level, the CD is enough, and the benefit of 8 skill speed is not obvious. .

lol melee ap heroes_melee heroes in English_how do melee heroes line up with Lu Bu

Tips: When you are not sure whether the opponent is an AD or AP hero who will come to line up with you, since Sylas's initial armor is relatively low, it is relatively better to point the armor.

There is also a set of electrocution and flow-through play, which may be used as a countermeasure when all the heroes on the opposite side are relatively brittle and explosive, and Sylas can only play one set at most. The idea is to use the push stick to maximize his own improvement. a set of outputs. I haven't used this set of runes much, so I just mentioned it. If you encounter this kind of situation, you can consider it.

Outfit ideas

Alignment period:

When Dolan's Ring goes out, the mage needs to rely on the battery life to produce a corruption potion, but I personally don't like it.

If you have an advantage in the lane, you can go home and replenish the Man Ring + Explosive Wand. The damage of this kind of equipment is very high, and you need to pursue lane kills, otherwise the mana will not be enough. Otherwise, we should first release small equipment in chapters to replenish mana.

The Killing Ring will greatly improve Silas. If there are advantages and opportunities, it will greatly increase the speed of Silas's snowballing.

Match equipment selection:

My personal order of equipment is Yongshuang + Stopwatch + Golden Body + Hat. If there is a follow-up, I will choose between Ghost Book or Magic Penetration Rod. Personally, I don’t really like going out of the astral realm, so maybe I’ll release the last one or sell shoes. Of course, when you have an advantage, Silas will not be melted when he enters the field. You can consider leaving the star realm first to improve your continuous combat capabilities.

Disadvantage Silas will be difficult to fight. At this time, try not to leave the star realm. It will be better to choose a hat to improve the all-in ability. When I play Silas, I usually don't use defensive equipment. If the opponent is the Chopper team and can't beat it, I can consider Bingxin (I have never won).

Shoes generally come from CD shoes. If you fight Xerath, you can even use the CD shoe hiding skill for 950.

combo skills

Melee heroes in English_lol melee ap heroes_How do melee heroes line up with Lu Bu

Sylas's basic combo is to overwhelm W because the long CD of W in the early stage determines that it is basically impossible for you to play two W. Therefore, using W when the number of conqueror layers is high can return more blood. If you feel that the dry pull is difficult to hit, you can also EWE. Using E2 to rush in with W can also increase the hit rate of the E skill.

The use of Yongshuang is more flexible. It can be used to slow down long-distance or close up to make the enemy full of Q2 and E2. You can explore by yourself.

Alignment ideas

Advantages and disadvantages of laning:

Limited by the level of segmented technicians, I personally feel that Silas is not very easy to play as a long-handed mage. He needs to move carefully to maintain blood and find opportunities to all-in a wave of solo kills in E.

In terms of melee combat, there is nothing particularly difficult to fight. Kassadin and Yasuo may be one of them. Pantheon has never encountered it, but I personally think it should be okay. Fighting Akali will cost the hit rate of both E's. Sett's will be better. After hearing the experience, you can consider fighting after the W level is high, but if you need to play one set, retreat and wait for the CD to play the second set. The same is true for the ruined king, and the sword girl has not encountered anyone who is particularly strong so far.

Sylas is going to jail for playing Zoe Icebird, but it is very rare for people to play these two heroes at low levels. You can leave the ban position to other popular heroes or heroes you hate. In addition, I personally hate Lucian and Male Gun, two heroes who are easier to avoid Sylas E2.

Ideas and techniques for threading:

Summoner skills are generally ignite + flash, and with TP it will be weaker.

At level one, generally learn E. If the opponent's hero's machine is too strong, such as Sett, learn Q. Level 1 Sylas is only equipped with experience, but when the opponent walks to the middle of the troop line or your troop line wants to force you out of the experience area, you can EAEA and retreat immediately after the fight.

Another little trick in the first wave of soldiers is that when the health of the three melee soldiers is relatively low, you can go E to A to collect the three melee soldiers, and then use E2 to steal the opponent and draw a draw to A.

If the blood exchange is more successful, you can consider learning W at level 2 and finding an opportunity to use E to hit full damage for a solo kill. The kill line with all skills is about two-thirds of the blood. If it fails, find an opportunity to use E at level 3-4. Level up this time point to compete.

Melee heroes in English_lol melee ap heroes_How do melee heroes line up with Lu Bu

Silas' kill line in the early stage is very high, which is something that many people don't expect. When Conqueror Dolan rings out, Silas, who is at level 3 with full Q1+Q2+E2, can output 559 points of damage against a 40 magic resistance dummy. With level 3 Ignite with 130 points of real damage, it can reach 690 points of health. Behead.

The value of level 4 Silas is 740 points. Basically, if the blood exchange is successfully carried out, Silas can reach the killing line. If you steal the Conqueror twice before all-in a set, the kill line can be even higher.

But if E is empty, Silas's output will be reduced by about 100 points, and Q2's hit rate will also be reduced. This is why the hit rate of E2 is an important condition that determines whether you can complete a solo kill in the early stage. .

After level 6, if Silas's R skill is a damage skill, then a full set of E, a hero with a relatively fragile mage body, and an ignited kill line will be full health. You can consider hitting all in to try to kill the opponent instantly.

At the same time, Sylas, the hero, also needs to play around the jungle. Sylas is stronger in small-scale team battles than most mid laners, so if the jungler fights for river crabs and is countered by the jungle, he will not lose. Timely support for the small loss line or even the small loss line is a very beneficial decision for Silas.

Relying on the ultra-high kill line, Sylas can basically do it in seconds against a jungler that is likely to be out of health. Not only is it possible to get kills and double BUFFs, but it also increases the success rate of calling ganks. When you gain an advantage in the lane, you can also call the jungler to invade the opponent's jungle area to capture the opponent's jungler, and radiate your advantage to the jungle area.

Similarly, if you encounter a gank during the laning phase, you can also look at the situation. If the opponent's midfielder is out of touch and the blood volume is not satisfied, you can try to counterattack with a set of instant kills.

Sylas's burst is very fast, and the damage of most heroes in the early stage is low, so even Sylas with low health volume still poses a huge threat as long as his health and mana are enough to complete a set of skills without dying. Players who come to gank Silas from the jungle position may need to pay attention. Think about the reason why Silas, who is still alive, first slowly and leisurely hit you twice when he met you.jpg

In the mid-to-late stage, if Sylas has a big enough advantage and has relatively advanced equipment, he can still go in seven and come out seven times. If his development is average, he needs to reasonably plan the team battle style according to the opponent's R skill.

However, unless he steals a team-opening ultimate move or has the opportunity to instantly reduce the opponent's strength, Silas, who is still essentially a mage, may die suddenly if he rushes in first in a team battle. It is best to wait for the warriors. Tank teammates must take the first wave of damage before entering the battlefield.

Conclusion

The above are some of my thoughts on the current version of Silas. At present, I am still working hard to learn and improve my gaming ability. This is also a summary of my current understanding. If it helps you, I'd be honored. If there is any correction on my understanding, I am quite willing to learn from it. Thank you for reading.

The Aircraft Carrier Forgotten By The Version-Death Prophet

Thinking back to the 6.86 era a year ago, the Death Prophet was reworked, and the three skills of Sorcery Research (passive) were changed to Soul-Absorbing Sorcery (active). Witchcraft Research was originally an enhancement of DP's other skills, shortening CD, reducing mana consumption, and increasing the number of evil spirits. Soul-sucking witchcraft is a skill that absorbs the enemy's life to increase one's own battery life, which will be introduced in detail later. After the new DP appeared on the scene, he immediately became a hot hit in the version. He became a favorite hero of the mid laner in both ranks and professions. The ultimate move combined with the strong recovery of soul-absorbing witchcraft is very useful in team battles and tower pushing. FATA and MU both like to use DP in the Shanghai Major and achieved good results. The initial soul-absorbing witchcraft provides the absorbed hero with vision, ignores magic immunity, and provides a slowing effect. It is pure damage. Facing Sven, a hero like Puppy who rushes in the face can also use hard steel. It is Ice Frog's usual style to cut it when it is hot. Because the soul-absorbing witchcraft is too buggy, the Death Prophet has been weakened in every subsequent version. The soul-absorbing witchcraft no longer provides vision and is changed to magic damage. It no longer ignores BKB. Multiple Links cannot target the same target. Nowadays, there are few DP players, but as an aircraft carrier-like existence, the Death Prophet is still very playable.

Skill introduction:

This skill is the main damage skill in the early stage of DP, with considerable damage, long range and short CD. It is very easy to use whether it is laning consumption or clearing troops in the jungle. The only disadvantage is that the mana consumption is slightly high, and the amount of mana in the early stage of DP is not much. The initial DP attack is quite high. After a few basic attacks on the minions, the swarm of insects will finally clear them out, pushing the lane very quickly. If you are facing a squishy hero, it is recommended to learn it at level 1. Basic attack plus insect swarm damage is considerable, which consumes the opponent's supplies. If you head hard and consume them, you can find opportunities to kill them. In the later stage, the main skill is to push the line. The CD is short, and two waves can be used to collect one wave of soldiers, which is very efficient.

Silence is a team skill. A single silence in a team battle may lead to the direction of the situation. The duration of silence at full level is 6S, and the Silence Warlock's ultimate move is only 6S. The range is relatively large. In general, it is no problem to silence two or three heroes in a team battle. This is equivalent to a small silent ultimate move. If the opponent is a hero who is aggressive, it is not impossible to silence five heroes at once. With a CD of 12S, two or even three Silences can be released in a team battle. It is considered a restraint against the legal heroes like Blue Cat, Karl, and Lao Lu who are aggressive in the face. The blue cat flies in and is silent for 6 seconds, then you can go home and count the seconds. If there are many legal heroes on the opposite side, it is recommended to order level 1 in the early stage. It is easy to use whether it is starting a group or retreating and cutting off one hand can save your life.

The core skill of DP can only be said to be a magical skill. Drain the enemy hero's life, restore your own life, and slow down. In team battles, you can ensure your own battery life. When encountering in the wild, you can slow down, chase and wait for teammates to support you, and you can even confront heroes who attack in the face. In the early days, it was not in vain to open up DP and confront Swin, but it is just that you can cut it with one knife after another. He no longer has the courage he once had. If you are facing a melee hero, it is recommended to learn it at level 1. You can consume the opponent to ensure your own status and stick to the crazy A. Not many heroes can handle it in the early stage. In the later stage of the team battle, I directly sucked four of them, and combined with the ultimate move Linglong Heart, basically no damage was done. The residual blood continued to be cool when the remaining blood was blown, and after that, I became a hero again. Although it is constantly being weakened, it is still very strong.

DP's ultimate move, push, and gank are all very useful. If Luna is the overlord of the river, then DP is the overlord of the jungle. Luna's ultimate move deals high damage and kills you instantly, while DP tortures you bit by bit and consumes you bit by bit. (In fact, the blood loss speed of the ultimate move using DP alone is also very fast.) Facing a high DP, ordinary heroes have nothing to do. You can't beat him against him. He has soul-absorbing deceleration when escaping, and his own movement speed is also fast. He is faster than you. A hero like the Anti-Mage Queen who can B can escape, or a high-burst hero like the Fire Lady who can directly take away the DP. Otherwise, you have to go home and call your teammates? Maybe both of you will die.

As for talents, I would choose +4% skill enhancement at level 10, +100 casting distance at level 15, -10% cooldown at level 20, and +6 evil spirits at level 25. In this way, the output is maximized. With Linglong Heart, the CD of the ultimate move is less than 100 seconds minus the duration of 35 seconds, and the vacuum period is almost only one minute, which basically guarantees that every wave will be large.

Outfit introduction:

Alignment: When I go out, I usually eat trees and a pendant in one group. Generally speaking, the mid lane hero will not cause too much trouble to DP. A group of tree eaters combined with three skills can completely transition to the bottle.

Early stage: There is definitely nothing to say about the bottle, such as controlling talisman, supply, and busy line. As for shoes, the DP mana consumption is low and the consumption is high. The secret method can be solved very well, and the combined soul stone can be dismantled later. If the opponent has many squishy skins and poor escape ability, it is recommended to phase, absorb the soul and slow down, combined with the high attack and high movement speed of the phase. Stick to chase and fight: If the opponent has a high burst in the early stage, it is recommended to use a prosthetic leg. After all, this hero needs to stand still and fight.

Mid-term: Generally choose the Wind Staff first, which provides mana recovery. You can save people when chasing, and you can also kill an opponent when escaping. When in disabled state, it can suck many people at once. After blowing itself up to save life, the state is basically back to full after coming down. If the opponent has a small control and the burst is relatively high, it is recommended to use BKB first. DP is a continuous output. As long as you can stand still, you can output unlimitedly. It will be embarrassing if you are controlled in seconds. In the early stage, BKB takes a long time, and basically no one can beat it with the ultimate move and sorcery. In the later stage, even if it is 5 seconds later, combined with the blow, the output environment is not bad, and the other side can only watch for 7 seconds. If the lineup is focused on advancement, it is recommended to play Linglong Heart first to reduce CD, provide blood recovery, and ensure battery life and survival.

Late stage: There are more things to consider. If the opponent mainly attacks with basic attacks, then use ice armor to increase your own armor and reduce the enemy's attack speed and movement speed. If the team needs it, you can use a strong attack. After all, the ultimate attack is physical damage; If the opponent has a high burst like PA, you can use Dragon Heart to increase your HP, temporarily leave the battlefield, recover for a while, and then come back to fight. You can also consider Sheep Knife to restrain heroes like Blue Cat Carl. Of course, if one's side just doesn't think too much about it, the Necronomicon is not bad, so just demolish the brigade.

Lineup coordination:

DP is suitable for positional warfare, team battle system or promotion system. Generally speaking, DP is in position 2. For the eldest brother position, you can choose Medusa. A hero like Sven who is more fleshy and can handle output in the front row. DP's ultimate move is physical damage. Combined with Medusa's petrification, team battles will explode. . You can also choose a push-type brother like Xiao Hei or Luna. Once the DP is equipped, he can output in the front row and protect the big brother from demolishing the tower.

Position 3 is suitable for group control such as Tide, Mystery, and Void, and creates an output environment for DP. 3s stun + 5s BKB + 2s wind wand, which is very strong and stable. The priority of No. 3 positions such as Bat, Clockwork, and Axe, which are ganks and catches, is one level lower. The DP relies on the big move rhythm, which is not suitable for small, short and fast lineups. Moreover, it is a bit wasteful to start a team battle with a big pull.

In terms of auxiliary support, it is more suitable to bring some small control players, such as earth cats and lions, to create an output environment; you can also use nannies such as Almighty, Dai Ze, and Oracle. Maybe DP can live for 1 second longer, and the output will be much greater, and you can even nurse it yourself. Live yourself. Oracle's ultimate move works wonders when combined with DP level three or the ultimate's soul recovery.