5 Types Of Painting That Newbies Must Know About Painting

There are many people who want to learn painting, but have no idea where to start. Here is a brief introduction to several common paintings for everyone to choose from.

01Simple strokes

Features of simple drawings:

A simple drawing is a kind of drawing that uses simple symbols such as points, lines, and surfaces to express the basic characteristics of objects. It is characterized by simplicity and intuitiveness. It only requires similarity in shape and does not pursue details.

It is simple, practical and easy to learn. Drawing simple drawings does not require advanced painting skills and can be mastered with just a little practice. And it is very convenient to use and you can draw anytime and anywhere.

Its writing style is simple and elegant, showing the characteristics of being both general and recognisable.

Painting Tools and Location:

No special tools or locations are required, it is easy to operate and can be painted anytime and anywhere.

Simple strokes for:

After learning how to draw simple figures, we can use them in mind maps and notebooks to add some color and elements to our notes, making them more vivid.

02 Sketch

Features of Sketch:

Sketching is a formal artistic creation and a relatively simple form of painting. Many beginners start with sketching. People with an art major have basically learned sketching.

The sketches are mostly drawn with 2H, HB, 2B, 3B, 4B, 5B, 6B and 8B pencils. It does not pay attention to the overall structure and color like other paintings, but focuses on structure and form.

Sketching is the basis for other arts, especially watercolor, oil painting, printmaking, sculpture (relief). In addition, for graphic design, it is also the necessary basis for sketching. Sketching is the basis of all ornamental art.

When people paint, they often draw an outline in advance as a draft, and then render it with color. When the artwork is completed, the sketch is often covered up or destroyed. Some people say that sketching is just a technical preparation. But now, sketching has become an independent art.

Sketch drawing site tools:

If you want to learn sketching seriously, you still need some specific tools, such as pencils with different hardnesses, sketching papers with different thicknesses and fineness, plastic erasers… You can get information by just looking up online.

03 Zentangle

Zentangle is a new art form that uses lines to create beautiful works. In recent years, it has become popular in the United Kingdom and the United States, and is also popular in Taiwan, Hong Kong and other places.

This art form was founded in 2005 by husband and wife duo Rick Roberts and Maria Thomas. Rick has had a variety of careers, such as taxi driver, high-tech product sales, financial analyst, investor, American flute designer, author, recording engineer, and he even spent many years as a monk. Maria is a renowned typeface designer and entrepreneur who founded Chief Printing, a company dedicated to custom stationery and design.

Zentangle combines Maria's artistic creation with Rick's rich experience. One day, Rick was observing Maria at work, and he noticed that Maria's state of concentration allowed him to concentrate fully on her creation.

Through discussion, they realized that what Maria was experiencing while creating was exactly what Rick was experiencing when he was meditating. Together, they created a series of methods and steps that allow anyone to enjoy peace of mind when creating beautiful images using repeating patterns.

With a repeating pattern of delicate lines, you can focus on each stroke—call it a meditative art form.

Many artists and athletes describe what Rick and Maria call this meditative art form as "breath-holding." Zentangle is not only an artistic method, it can also help us relieve stress and release our body and mind.

Research shows that this type of activity can help people better maintain energy, improve mood, help maintain calm during stressful situations, and is a form of public art with therapeutic properties. For individuals who need to process complex information, practicing Zentangle can also reboot the brain—just like you take a nap and wake up refreshed and refreshed. Zentangle allows you to gain confidence by creating dotted lines, design patterns and hand drawings, and continue to stimulate your potential artistic energy.

Tools and venue for Zentangle:

Zentangle painting does not require many tools, nor does it require advanced painting skills, but if you want to draw more beautiful and delicate paintings, you can buy a set of Zentangle special pens.

04 watercolor painting

Watercolor painting features:

Watercolor is a painting method that uses water to mix transparent pigments. It is called watercolor for short. Its colors are transparent. Covering one layer of color with another can produce special effects. However, mixing too many colors or covering too much will make the colors look dark. Watercolors are complex and dry quickly, so watercolors are not suitable for large-scale works, but are suitable for small, fresh and bright paintings such as landscapes.

Watercolor painting scenes and tools:

Compared with other paintings, watercolor painting pays more attention to expression techniques. It requires paint, water, brushes, thicker paper, and relatively certain site and tool limitations.

05 colored lead painting

Colored lead painting is a form of painting between sketching and color. Its uniqueness lies in its rich and delicate colors, which can show a lighter and more transparent texture.

This cannot be achieved with other tools and materials. Many people start with colored pencils when they first learn to draw. However, it is recommended that you practice sketching first, so that you can become comfortable with colored pencils.

Colored lead painting venues and tools:

There are no big restrictions on the venue. The work is divided into water-soluble colored pencils and oil-based colored pencils. The dragon fruit in the picture is painted with oil-based colored pencils, the cat is painted with water-soluble colored pencils, and the water-soluble colored pencils are used to draw animals. The effect is better on fur.

The above are several common painting methods, we can choose according to our own interests.
Q Version Characters

Huke.com provides you with graphic tutorials on how to draw characters and clothing in the Q version under the font design section. The software used in this tutorial is SAI and a digital tablet. The difficulty level is intermediate and high. Let’s start learning the content of this lesson!

This tutorial explains how to draw Q-version characters and clothing. If you like it, come and learn together.

After learning the content of this lesson, students can submit the homework pictures below the video according to the homework assignments below, and the teacher will answer them one by one.

So let’s start today’s tutorial.

1. The software used in this class is a combination of Sai and a digital tablet. The purpose of this class is to learn how to draw Q-version characters and clothing. The focus of the class is on the drawing of material fold lines. The difficulty of the class is grasping the direction of force.

2. Open the software Sai. The first step is how to draw wrinkles. Wrinkles are the morphological changes produced by materials under the action of external force. Draw wrinkle lines according to the direction of the force.

3. The drawing of real clothing folds and the Q version of clothing are different. The real skirt has more lines and is more three-dimensional, while the Q version has fewer lines and is drawn with fewer lines.

4. Below is the drawing of the short sleeves of the top. When laid flat, there are points where wrinkles will occur under the armpits, but the Q version should not have too many lines.

5. Next is the trousers, which are flat when laid flat, but wrinkled lines will appear on the knees.

6. Then draw the skirt. Pay attention to the shape of the skirt and the fold lines of the fabric. When drawing the folds, pay attention to the position of the fold points and the direction of the force.

7. This course is over, and the final effect is as shown in the picture. Thank you all, and I hope you will actively submit your homework.

The above is the entire content of the graphic tutorial on how to draw characters and clothing in Q version. You can also click on the video tutorial link below to view the video tutorial content of this lesson. You can learn one lesson for free every day on Huke.com, don’t miss it. oh!

Magnetic Drawing Board Manufacturer, Magnetic Drawing Board, Hongshun Technology Is Worth Recommending

Pan'an County Hongshun Craft Factory specializes in the production and sales of [Children's Drawing Boards], [Office Stationery], [Children's Easels], [Message Boards] and other products. You can contact the phone number on the picture for ordering consultation!

Beware of the "Seven Misunderstandings"!Give children appropriate art education

Overemphasis on painting skills and underestimation of imagination

Some parents are upset because their children's drawings are not round, square, or straight. This actually means that they fail to take into account the physical and mental characteristics of their children and ignore the cultivation of their own needs and interests.

There is actually no skill in children's painting. It is the accumulation and summary of experience.

Simply teaching children drawing skills will scare them away. Children never doubt their skills when drawing. There is nothing they cannot or dare not draw.

No matter how complex the characters or scenes are, they will become concise as long as they pass through their minds; no matter how simple things are, they will become rich as long as they are drawn by their hands. This is children's drawing.

Einstein said: "Imagination is more important than knowledge, because knowledge is limited, but imagination summarizes everything in the world, promotes progress and is the source of the evolution of knowledge."

Early childhood is the stage when bold imagination begins to form. At this stage, brain thinking patterns are easy to form and can be maintained permanently, so it is crucial to cultivate children's imagination in early childhood art classes.

Hongshun reminds you that children's interest in painting should be cultivated from an early age. Painting has a great impact on children. With magnetic drawing boards, it is important to choose a suitable children's drawing board for children to write and draw. The [Children's Drawing Boards] produced by Hongshun are all made of pine wood, and there are special instructions to teach you step by step how to install and use them, which is very convenient.

Pan'an County Hongshun Craft Factory specializes in the production and sales of [Children's Drawing Boards], [Office Stationery], [Children's Easels], [Message Boards] and other products. You can contact the phone number on the picture for ordering consultation!

At what age is it better for children to start learning to draw?

1. When choosing a children's art class, first of all, it is very important to understand the teaching philosophy of the teacher who teaches the children's art class. An excellent art teacher will definitely not teach children to draw according to their own needs. Instead, they will know how to interpret children, be patient, be good at discovering children's strengths and sensitive points, help children overcome difficulties and develop their potential, and make children more independent. Take the initiative to explore.

2. It is to inspect the class environment. Spacious and bright are the minimum requirements for a studio. It is also an important factor that one teacher does not have to deal with too many students at the same time. It is hard for me to imagine how a teacher who teaches more than 20 children at the same time can teach students in accordance with their aptitude. Art pursues individuality and diversity, as well as children’s creative ability and broad thinking.

Hongshun reminds you that children's interest in painting should be cultivated from an early age. Painting has a great impact on children. It is important to choose a suitable children's drawing board for children to write and draw. The [Children's Drawing Boards] produced by Hongshun are all made of pine wood, and there are special instructions to teach you step by step how to install and use them, which is very convenient.

Magnetic drawing board manufacturer, magnetic drawing board, Hongshun Craft is recommended to be provided by Pan'an County Hongshun Craft Factory. Magnetic drawing board manufacturer, magnetic drawing board, Hongshun Craft is worth recommending. It is newly upgraded and launched by Pan'an County Hongshun Craft Factory () this year. The above pictures are for reference only. Please call the contact number on this page or the picture to obtain new information. Contact person: Manager Li.

How To Deal With Incomplete Display Of CAD Drawings?Methods To Solve The Problem Of Incomplete Display Of CAD Drawings

How to deal with incomplete display of CAD drawings? In CAD drawings, we often encounter the situation where the opened drawings are not fully displayed. In this article, the editor will share with you the method to solve the problem of incomplete display of CAD drawings. Interested friends, please come and see with the editor of 45 Design Network how to deal with incomplete display of CAD drawings!

The method to solve the incomplete display of CAD drawings is as follows:

cad viewport magnification_cad magnification perspective shortcut key_cad perspective magnification command

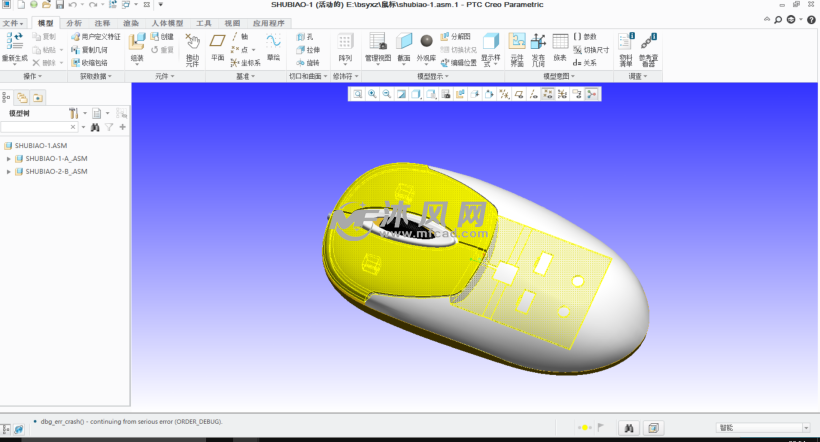
Step 1. How to deal with incomplete display of CAD drawings? When we open the drawing, we can see that the current drawing perspective can only see part of the drawing content, and cannot see the complete drawing situation.

cad magnification perspective shortcut key_cad viewport magnification_cad perspective magnification command

Step 2: If the CAD drawing is not fully displayed but part of the drawing can be located, we can directly slide the mouse wheel downward to reduce the drawing, reduce the size of the drawing to a suitable ratio, and then view all the drawings.

cad magnification perspective shortcut key_cad perspective magnification command_cad viewport magnification

Step 3. If the drawing content is scattered and the problem of incomplete display of CAD drawings needs to be solved, we can directly double-click the mouse wheel and the system will automatically display all the drawing files in the drawing frame.

cad perspective Zoom in command_cad zoom in perspective shortcut key_cad viewport zoom in

Step 4. Double-click the mouse wheel in the CAD software to directly display all the contents of the drawing file. However, if the CAD drawing is not fully displayed, the drawings will be arranged to the boundary line as much as possible to maximize the enlargement of the drawing, so we need to adjust the appropriate viewing angle again.

cad viewport zoom in_cad angle zoom in command_cad zoom in perspective shortcut key

Step 5. If you double-click the mouse wheel and the system cannot enlarge the drawing to a certain extent, then it is most likely a problem with the drawing model. We enter the command RE and press the space bar to regenerate the mode. After confirming the command, the system will display a command prompt to regenerate the model in the command bar. After completing the model regeneration, we can double-click the mouse normally to complete the full display of the drawings and solve the problem of incomplete display of CAD drawings.

Recommended: 2600 CAD interior furniture 3D models (CAD interior furniture comprehensive gallery 3D models)

The above five steps are how to deal with incomplete display of CAD drawings? How to solve the problem of incomplete display of CAD drawings. I hope the method sharing in this article can be helpful to friends.

Cute Q-version Figure Drawing Tutorial! Teach You How To Turn A Normal-proportioned Character Into A Q-version Character!

How to draw cute Q version characters? How to learn to draw?Presumably these are questions that beginners of painting often think about. They just don’t know how to learn painting well and then paint what they want to paint.

So today, Civet Cat Classroom has collected and sorted out some information on how to turn normal-proportioned characters into Q-version characters! The tutorial is very simple, come and take a look:

The following will explain how to draw Q-version figures with 2 and 3 heads and bodies!

First, break down and organize the elements of the character to determine the head and body.

・Color: Blue based on yellow and white

・Hairstyle: Short hair to below chin

・Face shape: double eyes, thick eyebrows

・ Clothing: 7-piece sleeve collar for tops and skirts only, knee-high boots

Figure painting q-printing_Character q-printing method_Simple q-printing method of drawing people

・ Essentials and decorations to bring:

Summarize the elements one by one like this.

Information about faces, in particular, becomes very important in showing character characteristics.

If it is eyes, there are hanging eyes, droopy eyes, eyeliner, small eyes, etc. If there are characteristic eyelashes, such as lower eyelashes and straight eyelashes, please describe the Q version of the character carefully.

Tips for transforming characters into 2.3 bodies

Figure painting q-printing method_Figure painting q-printing_Simple q-printing method of painting people

On the basis of the above, the actual implementation of deformation (deformation) determines your own head and body.

It is understood that the figure before transformation had about five heads and body.

Please refer to this picture to add balance to the mini character shape. Two heads and bodies are used as the main points of the depiction, such as: the ratio of head: torso: feet is 1:0.5:0.5, and the three-headed body. If this is the case, the ratio of head: torso: feet is 1:1:1. .

Also, let’s introduce the trick to be aware of the deformation of each body part. Especially in the case of a 2-headed body, I realize that a baby-like figure will look cute.

To transform into a Q-version character, let’s draw a character with two heads.

Here we will depict a two-headed mini character.

Character q-printing method_Simple q-printing method How to draw characters_Q prints of character paintings

When engaging in transformation, it is particularly important to exaggerate the parts that are characteristic of the character.

Do not shrink too much around the abdomen and joints, and give the impression of a baby-like body shape.

Be careful not to mess up your chin too, it will be better this way.

When drawing a face, don't draw it in the center of the face, but draw it slightly downward.

Figure painting q-printing method_Figure painting q-printing_Simple q-printing method of painting people

It is common for people who are not good at deformation to be too rigid in their human body structure and the deformation cannot fully occur.

When transforming, the human body structure should be ignored to a certain extent. When deformed, the shoulder width is squeezed as much as possible, giving people the feeling of a small person.

The hands are also described very small to give the impression of being petite.

In addition, be careful not to draw the lines of such clothes too thin, but have a conspicuous thickness.

Be generally aware of reducing lines, try to reduce wrinkles in clothes, lines in hair.

Figure painting q-printing_Character q-printing method_Simple q-printing method of drawing people

Draw a three-headed character

Here we explain the three-headed body.

The head is much longer than the two ends. Also, the body will be slightly more constricted than the two bodies.

However, when depicting male deformation, be careful not to excessively constrict the neck.

If the arms and legs are drawn thinner and longer than the two-headed body, the balance will be better.

The outlines of the clothes on the 2nd body are mostly gentle curves, but the drawing area of ​​the 3rd body is very large, so it would be better to add some wrinkles.

In this way, the three-headed Q-version character is completed!

By the way, I recommend that you search for: Civet Classroom, or open your phone and search in the add friend box: Civet Classroom, follow it with one click, and study without worries! There are a lot of illustration courses on it. Every day the teacher will guide you on your illustration techniques online, so that your laziness can’t escape. The key points are, it’s free, it’s really free, it’s really free!

How To Draw The Hair Of Q Version Characters? Tutorial On How To Draw Anime Character Hair!

How to draw the hair of Q version characters? How to draw the hair of Q version characters well? What are the techniques for drawing the hair of Q-version characters well? Presumably these questions are more troublesome for beginners of painting, so how can you draw the hair of anime Q version characters well? Today, the teacher of Civet Classroom collected and sorted out on the Internet how to draw the hair of Q version characters? Tutorial on how to draw anime character hair! The tutorial is very simple, come and take a look:

In the cute Q-version comics, hairstyle is an important element that distinguishes the characteristics of the Q-version characters. Therefore, when designing and drawing Q-version characters, the key to drawing a Q-version character well is to make the character's hairstyle suitable for his personality and have an impressive hairstyle.

As shown below:

1. The hair drawing of the Q version and the ordinary head and body is drawn according to the circular arc of the character's head. Generally, there is an appropriate amount of bangs in the front.

2. The hair of Q-version characters is generally simplified, and the hair groups are relatively simple and general.

Character painting q version_Simple q version character drawing method_Character simple drawing q version simple

Draw hair starting from the hair curler

As shown below:

1. Most people’s hair whorls are located at the back of the head. 2. The character’s hair grows with the hair whorl as the center.

3. Parts of the hair may flow messily.

Simple character drawing q version simple_Character painting q version_Simple q version character drawing method

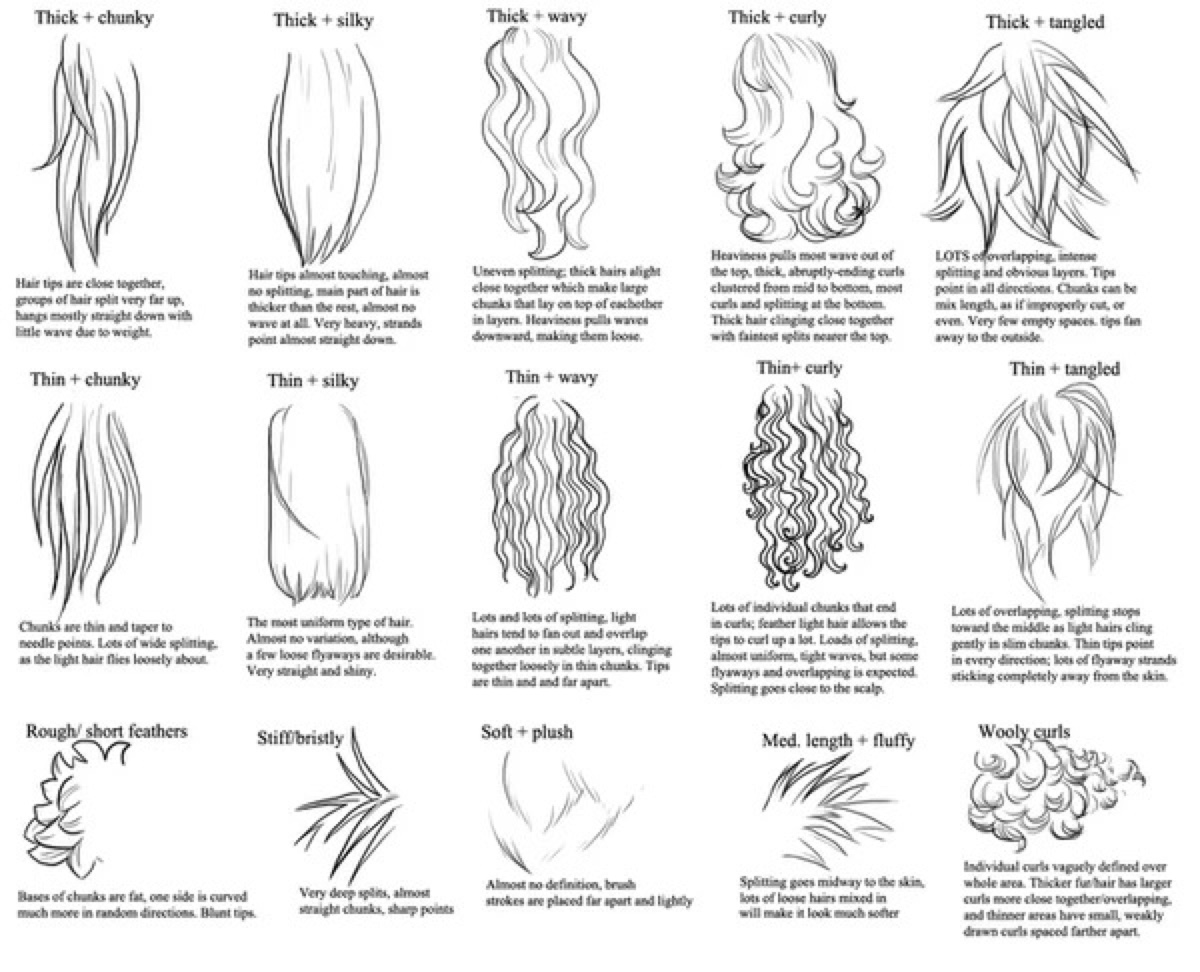
Q-version character hairstyles with different hair volumes

How to draw hairstyle

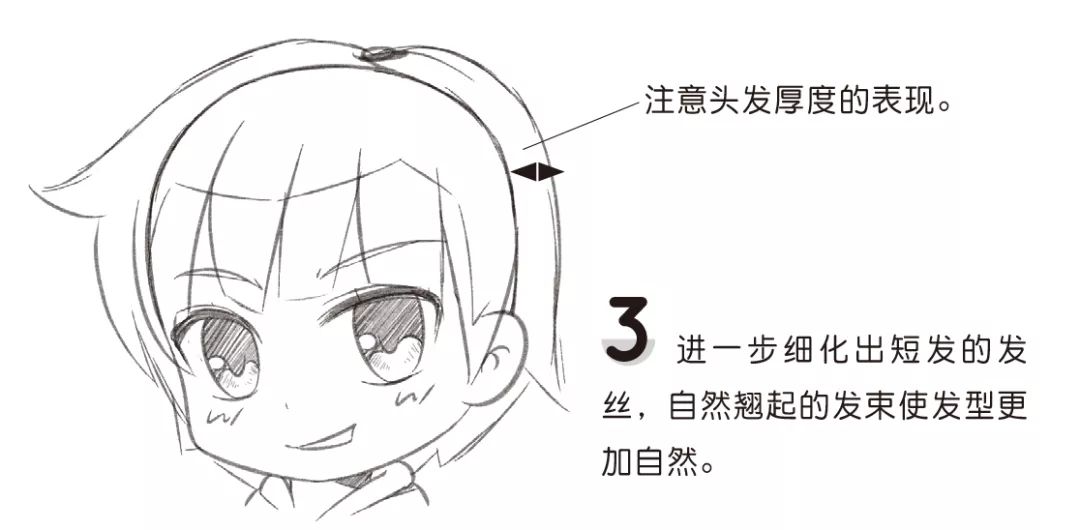
1. Draw the general outline of the hair. You can first use blocks to express the thickness and texture of the hair.

2. Draw the basic hair shape and general trend of the hair according to the outline.

3. Further add hair groups and pay attention to the consistency of the hair trend.

Simple q version character drawing method _Character drawing q version simple_Character painting q version

4. Further draw the trend of bangs and hair, and continue to group the hair.

5. Draw the details of the hair and pay attention to the undulating texture of the hair.

6. Draw the shadow of the hair and remove the structural lines of the head.

The four elements of drawing hair

Character painting q version_Character simple drawing q version simple_Simple q version character drawing method

Example display-colorful Q-version character heads

The above content is the high-quality tutorials collected and shared by Lingmao Classroom from the Internet. It mainly teaches you how to draw anime character hair! The tutorial is super practical. I believe this tutorial will definitely be helpful to everyone. Hurry up and save it for practice~

If you are interested in our self-study program

Welcome to join our free public welfare painting exchange community group:

Character painting q version_Simple q version character drawing method_Character simple drawing q version simple

There, we will have a lot of painting tutorials and material reference resources

There are also regular free live classes

Teachers will guide you online every day on your painting techniques

Help you open the door to painting improvement

Everyone can speak freely in the group

Enjoy painting in a relaxed communication!

Tutorial | A Set Of Very Simple Q-version Figure Drawing Tutorials!

What is the Q version? Q version is a deformed and exaggerated form of comics. The proportions of human figures are usually between two heads and four heads. It is characterized by a cartoon image with a big head and big eyes. It is a cute painting genre. The Q version also refers to the homophony of "cute" in English, which means smart and cute. Many of the Q-version images drawn by adults have cute and cute features. In fact, more than 20 years ago, Mr. Osamu Tezuka, the founder of Japanese comics, pioneered Q-version comics with his supreme magic, which laid a good foundation for the future popularity of Q-version comics and games around the world. So how do we draw it? Today I bring you a set of very simple Q version figure drawing tutorials! Let’s take a look!

1. Determine body proportions:

Tutorial on how to draw Q-print figures. The body proportions of an adult are roughly seven and a half heads, while Q-prints usually feature two or three heads. It presents a child-like image. But the Q version does not mean to retain the head and reduce the body to a head-long image. This will not express the cuteness of the Q version but will make the character look particularly strange. The Q version makes the overall image more rounded. Whenever you decide to draw a Q-version character, you must first determine the specific dynamics of your character. A Q-version image with two heads and a body can only make some relatively simple body movements, but if some movements are larger, Yes, it may be necessary to use three heads or even five heads to represent it. like:

1. 4-head Q-version comic characters:

It is basically equivalent to the body shape of a child with a normal head-to-body ratio, but it can still be seen from the expression, movement, and clothing that it is a Q version of the character. 4. The body shape of the character can be drawn more realistically. The knees are between the waist and 1/2 of the soles of the feet. The calves are longer than the thighs to reflect the slenderness of the characters.

2. 3-head Q-version characters:

The proportions of the head, torso and legs of the 3-head and body Q version comic characters are balanced, generally 1:1:1. This kind of head and body is generally used to express the boy Q version of the character. 3-headed characters have the best body balance, with the ratio of head, torso, and legs approximately 1:1:1. The legs start to get longer.

3. 2-head Q-version characters:

2. Head and body: The head and body of the Q-version comic character are roughly the same length. When drawing, pay attention to shrinking the entire body. The width of the head must be greater than the width of the shoulders to achieve coordination. When creating a cute Q-version character with two heads and a body, in addition to the big head and small body, you should also pay attention to the short length of the legs, which is about 1/3 of the body, and the arms are even longer than the legs.

2. Dynamic exercises:

When appropriate, you can draw some Q-version exercises, capture the characteristics of the normal-proportioned characters, and then shorten the limbs. It doesn’t matter if you have a little baby fat, and you can make some simplifications on the clothes. If necessary, the character's movements can be significantly modified, and don't be limited to the character's original posture. Of course, the rationality of character dynamics must also be considered when revising.

3. Q-version of facial features:

The facial features of the Q version are very different from the real facial features. The facial features of the Q version will appear slightly exaggerated. Usually people's eyes are very small, but the eyes of the Q version will be very big. People's noses are also very three-dimensional in real life, but In the Q version, the nose will be reduced to a dot, or even nonexistent; the ears will also look very round and cute in the Q version; the mouth will also be more exaggerated. In some cases, in order to express hilarious scenes, the mouth will be enlarged to account for half of the entire face. . Of course, with such cute facial features, a character can be displayed vividly.

After reading the tutorial, if you still get the feeling that "you can master it as soon as you see it, but you can't draw it as soon as you draw it", then you may need this: Q version comic character introductory teaching course! This set of courses will teach you how to draw Q-version cartoon character illustrations through examples. Through practical explanations and demonstrations, you will learn how to draw Q-version cartoon character illustrations!

Screenshots of the Q-version comic character tutorial course

How To Draw Q Version Characters? Tutorial On How To Draw Anime Q Version Characters!

​​How to draw Q version characters? How to draw Q-version characters well? What are the techniques for drawing Q-version characters well? Presumably these questions are more troublesome for beginners of painting, so how can we draw anime Q-version characters well? Today, the teacher of Lingmao Classroom collected and sorted out on the Internet how to draw Q version characters? Tutorial on how to draw anime Q version characters! The tutorial is very simple, come and take a look:

Q-version cartoon characters have conquered the hearts of many young people with their cute and humorous images. Q-version character paintings are different from other art forms and have their own unique charm.

How to draw the body of a character in Q version

The 4-head and body Q-version characters are basically equivalent to the size of a child with a normal head-to-body ratio, but it can still be seen from their expressions, movements, and clothing that they are Q-version characters.

4. The body shape of the character can be drawn more realistically. The knees are between the waist and 1/2 of the soles of the feet. The calves are longer than the thighs to reflect the slenderness of the characters.

Various Q-version characters with 4 heads and bodies

3 heads and body Q version characters

The proportion of the head, torso and legs of the 3-headed figure is balanced, generally 1:1:1. This kind of head and body is generally used to express teenage Q version characters.

Figure painting q version_Simple method of drawing q version figures_Figure painting q prints

3-headed characters have the best body balance, with the ratio of head, torso, and legs approximately 1:1:1. The legs start to get longer.

Various Q-version characters with three heads and bodies

2 heads and body Q version characters

2. Head and body: The head and body of the Q-version character are roughly the same length. When drawing, pay attention to shrinking the entire body. The width of the head must be greater than the width of the shoulders to achieve coordination.

When creating a cute Q-version character with two heads and a body, in addition to the characteristics of a big head and a small body, you should also pay attention to the short length of the legs, which is about 1/3 of the body, and the arms are even longer than the legs.

Various Q-version characters with 2 heads and bodies

Figure painting q version_Simple method of drawing q version figures_Figure painting q prints

How to draw hair of characters in Q version

In comics of the same style, hairstyle is an important element that distinguishes characters. When designing and drawing characters, having a hairstyle that suits their personality and an impressive hairstyle is the key to drawing a good Q-version character.

As shown below:

1. The hair drawing of the Q version and the ordinary head and body are drawn according to the circular arc of the character's head. Generally, there is an appropriate amount of bangs in the front.

2. The hair of characters in the Q version is generally simplified, and the hair groups are relatively simple and general.

Draw hair starting from the hair curler

As shown below:

Figure painting q version_Figure painting q prints_Simple How to draw q-version characters

1. Most people’s hair whorls are located at the back of the head.

2. The character’s hair grows with the hair whorl as the center.

3. Parts of the hair can flow messily.

Q-version character hairstyles with different hair volumes

How to draw hairstyle

1. Draw the general outline of the hair. You can first use blocks to express the thickness and texture of the hair.

2. Draw the basic hair shape and the general trend of the hair according to the outline.

Simple how to draw q-version characters_Character painting q-version_Character painting q-prints

3. Further add hair groups and pay attention to the consistency of the hair trend.

4. Further draw the direction of the bangs and hair, and continue to group the hair.

5. Draw the details of the hair and pay attention to the undulations of the hair texture.

6. Draw the shadow of the hair and remove the structural lines of the head.

The four elements of drawing hair

Example display – colorful Q-version character heads

Figure painting q-prints_Character painting q-version_Simple how to draw q-version characters

The above content is the high-quality tutorials collected and shared by Lingmao Classroom from the Internet. It is mainly a tutorial on how to draw anime Q version characters! The tutorial is super practical. I believe this tutorial will definitely be helpful to everyone. Hurry up and save it for practice~

If you are interested in our self-study program

Welcome to join our free public welfare painting exchange community group:

There, we will have a lot of painting tutorials and material reference resources

There are also regular free live classes

Teachers will guide you online every day on your painting techniques

Help you open the door to painting improvement

Everyone can speak freely in the group

Enjoy painting in a relaxed communication!

Statement: The material comes from the Internet, and the copyright belongs to the original work. It is only for learning and exchange, not for commercial use.​​​​

Colored Pencil Drawing Techniques | Colored Pencils ~ Steps For Drawing Plum Blossoms

Colors used to draw plum blossoms with colored pencils: pink, red, coffee, yellow, brown

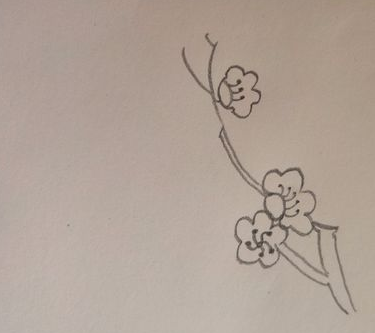
First, draw the outer outline of the plum blossom.

Then draw the stamens of the plum blossom, paying attention to the direction of the stamens.

Video tutorial of pencil drawing of plum blossoms_Steps of drawing plum blossoms pencil drawing_Steps of drawing plum blossoms pencil drawing

Draw other plum blossoms around it in the same way.

Finally, add the plum blossom branches below the flowers, so that the line drawing of the plum blossoms is completed.

Steps of pencil drawing of plum blossoms_Steps of drawing plum blossoms with pencil_Video tutorial of pencil drawing of plum blossoms

Color

1. First, use a thick pink pencil to paint a large area of ​​plum blossoms with color.

2. Use a slightly darker color to add a layer of shadow to the plum blossoms. Note that you also use a thick pencil.

Video tutorial of pencil drawing of plum blossoms_Steps of drawing plum blossoms pencil drawing_Drawing plum blossoms Pencil step-by-step diagram

3. Use a bright red pencil to strengthen the dark parts of the plum blossom and the overlapping petals.

4. Use a brown pencil to darken the darkest part of the plum blossom. Be careful to use a thin pencil here.

Video tutorial of pencil drawing of plum blossoms_Steps of drawing plum blossoms pencil drawing_Drawing plum blossoms Pencil step-by-step diagram

5. Use a thin yellow pencil to draw the stamens of the plum blossom, paying attention to the direction of the stamens.

6. Finally, use a brown pencil to draw the branches of the plum blossom. Pay attention to using different strengths to draw the three-dimensional sense of the branches. After drawing the branches, an image of a plum blossom is completed.

Step-by-step pencil drawing of plum blossoms_Video tutorial of pencil drawing of plum blossoms_Step-by-step pencil drawing of plum blossoms

Using different painting methods and pencils of different thicknesses to color plum blossoms can make the plum blossoms more vivid.

Use a thick pencil to paint most of it, and then use a thin pencil to line up the texture of the petals and stamens.

(Images and texts come from the Internet, the copyright belongs to the original author, any infringement will be deleted)

Introduction: 2020 latest edition of self-study tutorials on colored lead painting

A set of color lead training tutorials for beginners to learn color lead painting, including the teaching of all core techniques in color lead painting. The video data is nearly 1200G, with more than 1000 videos, and a massive accumulation of tens of thousands of minutes of high-definition videos!Let you master the latest and most comprehensive pencil drawing practical skills in a timely manner

How To Draw A Girl Wearing Hanfu

How to draw a simple drawing of a girl in Hanfu?

1. First draw the girl’s hair. The hair is rolled up into a bun. Draw hairpin flowers on the bun. Draw her broken bangs and round face, as shown in the picture below. 2. Draw her facial features, and then draw the little girl’s clothes. The two sleeves are very long, and draw a belt around the waist, as shown in the picture below. 3. Continue to draw…

How to draw a girl in Hanfu

The drawing method of a Hanfu girl is as follows: (1) First draw a cute little round face, with hair spread out in stripes, two small watermelon-shaped buns on the back of the head, and a few more textures on it. Then draw the little girl's body, draw stripes on the cuffs of the dress, and draw a few more flowers on the dress. Then draw a belt and a…

Video tutorial on how to tie a belt in Hanfu_How to tie a belt in Hanfu_How to tie a belt in Hanfu

How to draw Hanfu women's clothing

The drawing method of girls' Hanfu is as follows: 1. Draw the outline: everyone first uses a pencil to draw a large outline proportion, first the whole and then the partial practice, and then use the outline pen to outline the lines. 2. Drawing Hanfu: There are many lines in Hanfu, which requires more patience. There seems to be no shortcut in drawing. If you practice more every day, you will be able to draw well.

How to draw fairies in Hanfu for girls

Women's belt in Hanfu

1. First, draw the outline of the girl’s body, including the head, body and limbs. Basic shapes can be outlined using simple lines. 2. Next, draw the basic shape of the Hanfu. Hanfu usually consists of a robe and a belt, so you need to pay attention to the length and width of the robe and belt. 3. Then, draw the details according to the Hanfu style.

How to draw girls’ Hanfu

1. First we draw the girl’s head. 2. Then draw the girl’s upper body and facial features. 3. Draw a lantern on the girl’s hand. 4. Draw the girl’s lower body. 5. Then draw some loose hair for the girl. 6. Finally, color the girl, so that the simple drawing of the girl in Hanfu is completed!

How to tie a belt in Hanfu_Video tutorial on how to tie a belt in Hanfu_How to tie a belt in Hanfu

How to draw a Hanfu princess

1. Draw the outline of the Hanfu princess’s head. After drawing the facial features of the ancient princess, draw the hair crown of the ancient princess and add some beautiful and gorgeous headdresses to the hair. 2. Draw the body of the Hanfu princess. , then draw the clothes and skirts, put both hands on the chest and hold a folding fan, the sleeves are very wide and cardigan style, the long dress is very long…

How to draw an ancient princess

Video tutorial on how to tie a belt in Hanfu_How to tie a belt in Hanfu_How to tie a belt in Hanfu

6. Then we draw the belt on the princess’s chest. The two long belts naturally float in front of the body. 7. Finally, draw the long skirt worn by the princess. When drawing the long skirt, you must draw every hem and pleat on the skirt. Then you will have a lovely Hanfu princess. Famous princesses in ancient times: Emperor Hui Jin’s daughter Hedong Princess: Sima Xuanhua…

How to apply makeup on a little girl in Hanfu

The method of painting a little girl’s Hanfu makeup is as follows: 1. Grasp the fairy image to beautify it. When painting fairy Hanfu, you need to pay attention to the vivid image and reflect the holy and refined temperament of the fairy, that is, the fairy-like state of not eating the fireworks of the world. This will give people a dreamlike, otherworldly feeling. In terms of details…

Video tutorial on how to tie a belt in Hanfu_How to tie a belt in Hanfu_How to tie a belt in Hanfu women

How to draw little girls’ costume makeup, children’s Hanfu stage makeup pictures of girls, how to draw

The stage makeup of a little girl wearing Hanfu should reflect a soft and steady feeling, while the makeup of a girl should be more delicate. First use a skin-colored liquid foundation, then apply a layer of loose powder, and then apply highlighter and blush. The blush should be evenly applied, just a little less. Eye makeup is the key point. Shape your eyebrows first, and willow-leaf eyebrows are the best. Then outline the eyeliner, and then use pink eyeshadow…

How to draw a Hanfu long skirt

1. Draw the crossed collar of the costume skirt and the belt with a bow. 2. Draw big sleeves and flowing skirt. 3. Use black to trace the skirt, paint it with a beautiful color, and finally trace it again. History of Hanfu: The history of Hanfu refers to the development history of Han nationality costumes. Hanfu is the national costume of the Han nationality in China and has been passed down for thousands of years…